You post on Facebook. You boost some posts. Maybe you even run a few ads. People like them. They comment. They share. But your phone isn’t ringing, and your inbox isn’t filling up with people ready to buy.
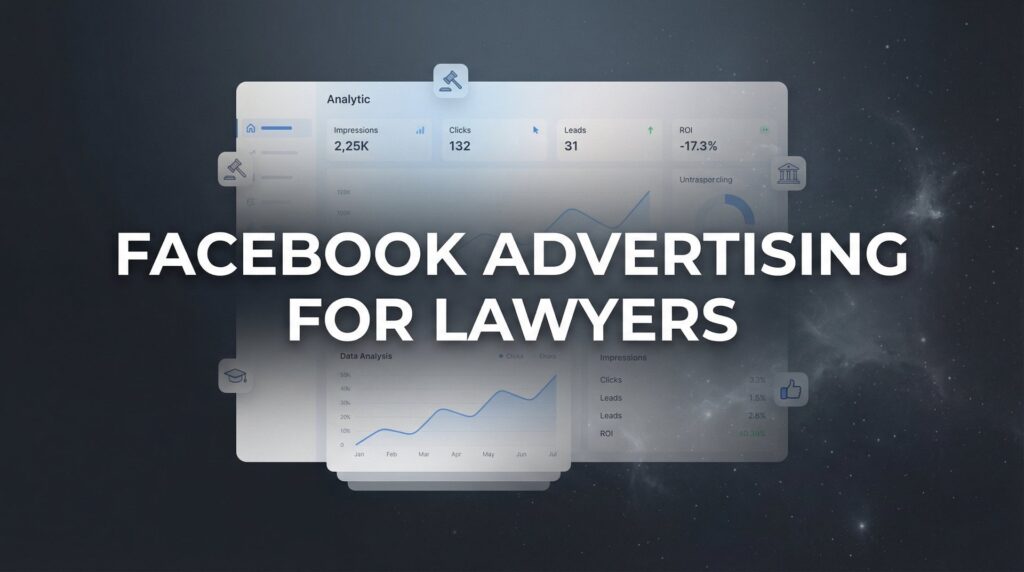
Here’s the truth: Facebook has over 3 billion monthly active users actively engaging with business content. That’s not the problem. The problem is that most local business owners are running campaigns designed to get engagement—not leads.
There’s a massive difference between a campaign that generates likes and one that captures contact information from people ready to spend money. The businesses filling their pipeline with qualified prospects every single week aren’t getting lucky. They’re following a systematic process that turns Facebook’s massive audience into a predictable lead generation machine.
This guide walks you through that exact process. Whether you run a service-based business, operate a local retail shop, or manage a professional practice, you’ll learn how to set up, launch, and optimize Facebook campaigns that deliver real contact information from potential customers—not just vanity metrics that look good but don’t pay the bills.
Let’s get started.
Step 1: Set Up Your Facebook Business Infrastructure
Before you spend a single dollar on ads, your business foundation needs to be rock solid. Think of this like building a house—you wouldn’t start with the roof. The same applies here.
Start with your Facebook Business Page. This isn’t optional. Your page needs complete business information: accurate hours, phone number, address, website link, and a description that clearly explains what you do and who you serve. Add a compelling cover image that communicates your value proposition at a glance. Set up a clear call-to-action button—”Book Now,” “Call Now,” or “Send Message”—depending on how you want prospects to reach you.
Next, set up Meta Business Suite. This is your command center for managing ads, tracking performance, and connecting all your business assets. Navigate to business.facebook.com and create your Business Manager account. Connect your Facebook Page and create an ad account with proper payment methods. This separation between your personal profile and business operations protects you and gives you professional-level control.
Now comes the critical piece most businesses skip: installing the Meta Pixel on your website. This small piece of code tracks what happens after someone clicks your ad. Without it, Facebook can’t optimize your campaigns for actual conversions. It’s like driving with your eyes closed.
To install the Pixel, go to Events Manager in Business Suite, create your Pixel, and follow the setup instructions. If you use WordPress, Shopify, or another major platform, there are plugins that make this simple. If you’re not technical, your web developer can handle this in minutes. The Pixel needs to be on every page of your website—especially your thank-you page after someone submits a lead form.
Finally, verify your business domain. This unlocks advanced advertising features and builds trust with Facebook’s systems. In Business Settings, go to Brand Safety, then Domains, and follow the verification process. You’ll need to add a DNS record or upload an HTML file to your website. Again, if this sounds technical, your web person can knock this out quickly.
Once these four elements are in place—optimized Business Page, Meta Business Suite setup, Pixel installed, and domain verified—you’re ready to build campaigns that actually work. Skip any of these, and you’re handicapping yourself before you even start.
Step 2: Define Your Ideal Customer and Build Targeting Audiences
Here’s where most businesses go wrong: they target “everyone” because they think more reach equals more leads. It doesn’t. Precision beats reach every single time.
Start by creating a detailed customer avatar based on your best existing customers. Not the customers you wish you had—the ones who actually buy from you, pay on time, and refer others. Write down their demographics: age range, gender, income level, location. Then dig deeper into their pain points and buying triggers. What problem were they trying to solve when they found you? What made them choose you over competitors?
This isn’t academic exercise. This information directly translates into how you target your ads and what you say in your copy.
Now build your Custom Audiences. These are gold because they’re made up of people who already know you exist. In Meta Business Suite, go to Audiences and create Custom Audiences from three sources: your email list, website visitors, and people who’ve engaged with your Facebook Page.
Upload your customer email list to create a Customer List audience. Facebook will match these emails to user profiles. This becomes your retargeting audience and the foundation for finding similar prospects. Create a Website Visitors audience that captures anyone who visited your site in the last 180 days. Then create an Engagement audience of people who interacted with your Page or ads in the last 365 days.
These audiences are warm. They’ve already shown interest. They’ll convert at higher rates and lower costs than cold prospects.
Next, create Lookalike Audiences. These are Facebook’s secret weapon for finding new customers who match your best existing ones. In Audiences, select your Customer List audience and create a Lookalike. Start with a 1% Lookalike—this gives you the most similar prospects in your target geographic area. As you scale, you can test 2% and 3% Lookalikes, which expand the net but may be less precise.
For local businesses, geographic targeting is critical. Don’t target your entire state if you only serve a 20-mile radius. Use precise location targeting: drop a pin on your business location and set a radius that matches your actual service area. This prevents wasted ad spend on people who’ll never become customers because they’re too far away. Understanding lead generation for local business means knowing exactly who you’re trying to reach.
Layer your geographic targeting with interest and behavior targeting. If you’re a personal injury attorney, target people interested in legal services within your radius. If you run a home remodeling company, target homeowners interested in home improvement within your service area. This layering approach—geography plus interests plus behaviors—creates precision without limiting your reach too much.
The beauty of this system is that you’re not guessing. You’re using data from your actual customers to find more people just like them, then targeting them where they actually live and based on what they’re actually interested in. That’s how you turn Facebook’s massive audience into qualified leads for your specific business.
Step 3: Create Your Lead Magnet and Offer
Nobody wakes up thinking, “I really want to give my contact information to a business today.” You need to give them a reason—a compelling one.
Your lead magnet is that reason. It’s a valuable piece of content or service you offer in exchange for contact information. The key word is valuable. Your lead magnet must solve a specific problem your target audience has right now.
For service businesses, the most effective lead magnets are often free quotes, consultations, or assessments. A roofing company might offer a free roof inspection. A financial advisor might offer a free retirement planning consultation. A personal trainer might offer a free fitness assessment. These work because they’re directly tied to your core service and attract people ready to buy.
For businesses where immediate service isn’t the ask, educational lead magnets work well. A real estate agent might offer a “Home Buyer’s Checklist.” A marketing agency might offer a “Website Audit.” A landscaping company might offer a “Seasonal Lawn Care Guide.” The content should be genuinely useful—not a thinly veiled sales pitch. If you’re in the property market, explore automated lead generation solutions for real estate to see what’s working now.
Discounts and special offers work too, but be careful. Don’t train your market to only buy when you’re running a promotion. If you use discounts, make them time-limited and position them as special opportunities, not your standard pricing.
Once you have your lead magnet, craft your offer copy. This is where most businesses get lazy. They write generic copy like “Get your free quote today!” That’s not compelling. It doesn’t speak to pain points or desired outcomes.
Instead, write benefit-focused copy that connects emotionally. “Worried about your roof making it through another winter? Get a free inspection from certified roofing experts—we’ll show you exactly what needs attention and what can wait.” See the difference? You’re speaking directly to a concern, positioning your expertise, and promising clear value.
Your copy should follow a simple formula: call out the problem, present your solution, explain the benefit, and tell them exactly what to do next. Keep it conversational. Write like you’re talking to a friend, not reading from a corporate brochure.
Now design your creative assets. You don’t need a professional designer, but you do need clean, professional-looking images or videos. Use high-quality photos of your actual business, team, or work. Avoid cheesy stock photos that scream “generic business.” People connect with real.
Your creative should stop the scroll. Facebook is a noisy place. Use bold text overlays that communicate your value proposition in three seconds or less. Show faces—images with people perform better than images without. And make sure your creative matches your copy. If your ad talks about roof inspections, show someone inspecting a roof, not a random house exterior.
The combination of a valuable lead magnet, compelling copy, and scroll-stopping creative is what turns casual scrollers into leads. Miss any of these three elements, and your campaign will struggle no matter how good your targeting is.
Step 4: Build Your Facebook Lead Generation Campaign
Now we get tactical. You have two main options for capturing leads on Facebook: Lead Ads with native forms, or conversion campaigns that send people to a landing page on your website. Each has its place.
Lead Ads keep everything inside Facebook. Users tap your ad, a form pops up with their information already filled in, they hit submit, and you have their contact details. The advantage? Minimal friction. People don’t have to leave Facebook, wait for a page to load, or manually type their information. For mobile users—which is most Facebook users—this matters tremendously.
Conversion campaigns to landing pages give you more control. You can provide more detailed information, include testimonials, show more images, and create a fuller experience. The downside? Every extra step loses people. If your landing page loads slowly or looks bad on mobile, you’ll hemorrhage leads.
For most local businesses starting out, Lead Ads are the better choice. They convert at higher rates because of reduced friction, and they’re simpler to set up. You can always test landing pages later once you’re generating consistent leads.
To build your campaign, go to Meta Ads Manager and click Create. Choose your campaign objective—for Lead Ads, select “Leads.” Name your campaign something descriptive so you can track it later: “Lead Gen – Free Roof Inspection – March 2026.”
At the ad set level, choose your targeting audience. Start with one audience per ad set so you can measure performance clearly. Select your geographic targeting, then either your Custom Audience, Lookalike Audience, or interest-based targeting. Set your budget—we’ll talk specific numbers in the next step.
Now create your Lead Ad form. Facebook calls these Instant Forms. Start with the form type that matches your goal—”More volume” captures basic info with minimal questions, while “Higher intent” adds qualifying questions to filter leads.
Structure your form strategically. Start with a compelling headline and intro text that restates your offer. Use the auto-fill feature—this pre-populates fields with the user’s Facebook information, reducing friction. Ask for the minimum information you need: typically full name, email, and phone number.
Here’s where it gets interesting: custom questions. Adding one or two qualifying questions improves lead quality, even if it slightly increases your cost per lead. For a home services business, ask “What type of service are you interested in?” with multiple choice options. For a B2B service, ask “What’s your business size?” This helps you prioritize follow-up and filters out tire-kickers. If you’re struggling with poor quality leads from marketing, these qualifying questions are essential.
Add a privacy policy link—this is required. Include a custom disclaimer if needed: “By submitting, you agree to receive calls and texts about your inquiry.” This sets expectations and keeps you compliant.
On your thank-you screen, tell people what happens next. “Thanks for requesting your free inspection! We’ll call you within 24 hours to schedule a time that works for you.” Clear expectations reduce anxiety and improve show-up rates.
Finally, set up instant lead notifications. In your form settings, enable instant download and add your email address to receive leads immediately. Better yet, integrate with your CRM so leads flow directly into your follow-up system. Speed matters—we’ll cover why in Step 7.
Step 5: Launch and Monitor Your Campaign Performance
You’re ready to launch. But before you do, let’s talk budget. Starting with the right budget sets you up for success.
For testing, start with a daily budget that allows Facebook’s algorithm to gather meaningful data. A good starting point is $20-30 per day per ad set. This gives the algorithm room to test different users and optimize delivery without burning through your budget too quickly.
Why not start smaller? Facebook’s learning phase requires approximately 50 conversion events per week for optimal performance. If your budget is too small, you’ll never exit the learning phase, and your campaigns will never optimize properly. It’s like trying to learn to drive by only practicing once a month—you’ll never get good at it.
Once you launch, resist the urge to check your ads every hour. Give your campaign at least 24-48 hours to gather initial data before making any judgments. The learning phase typically lasts 3-7 days, depending on how quickly you accumulate conversions.
Monitor these key metrics in Ads Manager: cost per lead, lead quality, click-through rate (CTR), and relevance diagnostics. Cost per lead tells you if your campaign is profitable. If you know your average customer value and close rate, you can calculate your maximum acceptable cost per lead and measure against it. Understanding lead generation services cost benchmarks helps you know if your numbers are competitive.
Lead quality matters as much as quantity. Track how many leads actually answer the phone, show up for appointments, or turn into customers. A campaign generating leads at $15 each that never convert is worse than one generating leads at $40 each where 30% become customers.
CTR indicates how compelling your ad creative and copy are. A CTR above 1% is decent for cold traffic; above 2% is strong. If your CTR is below 0.5%, your ad isn’t resonating—test different creative or copy.
Relevance diagnostics show how Facebook’s algorithm views your ad. Check your Quality Ranking, Engagement Rate Ranking, and Conversion Rate Ranking. If any of these are “Below Average,” it’s a warning sign that something needs to change.
During the learning phase, avoid making changes that reset optimization. Don’t adjust targeting, budgets, or creative significantly. Let the algorithm learn. The only exception is if something is clearly broken—like you accidentally targeted the wrong location or your form isn’t working.
Watch for early warning signs of underperforming ads. If you’re 3 days in with zero leads, that’s a problem. If your cost per lead is 3x your target, that’s a problem. If your relevance rankings are all “Below Average,” that’s a problem. Know when to pause and regroup versus when to let things run.
The key is finding the balance between patience and decisive action. Give campaigns enough time to work, but don’t throw good money after bad when something clearly isn’t working.
Step 6: Optimize and Scale Your Winning Campaigns
Once you have a winning campaign—one that’s generating leads at an acceptable cost with decent quality—it’s time to optimize and scale. This is where good campaigns become great ones.
Start with systematic A/B testing. Test one variable at a time so you know what’s actually making the difference. Create duplicate ad sets and test different audiences: Custom Audience versus Lookalike versus interest-based. Run these simultaneously with identical budgets and creative.
Test ad creative by duplicating your ad set and swapping out images or videos while keeping copy identical. Test different photos, different video hooks, different design styles. The winning creative often surprises you—what you think will work and what actually works are frequently different.
Test copy by keeping creative identical but changing headlines, primary text, or call-to-action buttons. Try different angles: pain-focused versus benefit-focused, question-based versus statement-based, short versus long copy. Track which approach resonates with your audience.
When you find a winner—an ad set outperforming others by 20% or more on cost per lead—it’s time to scale. But scale gradually. Increasing budget too quickly resets the learning phase and tanks performance. Learning how to scale Facebook ads properly is the difference between growth and wasted spend.
The safest scaling method is the 20% rule: increase your daily budget by no more than 20% every 3-4 days. If your ad set is running at $30/day and performing well, increase it to $36/day. Wait 3-4 days, monitor performance, then increase to $43/day if it’s still performing. This gradual approach maintains optimization.
Another scaling method is audience expansion. Once a Lookalike Audience is working, test a 2% or 3% Lookalike to expand reach while maintaining similarity to your best customers. Or expand geographic targeting if you can serve a larger area.
Implement retargeting campaigns to capture leads who engaged but didn’t convert. Create a Custom Audience of people who clicked your ad but didn’t submit the form. Target them with a different angle or a stronger offer. These people already showed interest—they just needed a different push. Master Facebook remarketing ads to recapture these warm prospects effectively.
Build an ongoing testing calendar. Every week, launch at least one new test: a new audience, new creative, or new copy angle. This keeps your campaigns fresh and prevents ad fatigue, where your audience sees your ads so many times they start ignoring them.
The businesses that dominate Facebook lead generation aren’t the ones who set up a campaign and forget it. They’re the ones constantly testing, optimizing, and scaling what works while cutting what doesn’t. Make optimization a habit, not a one-time event.
Step 7: Convert Leads Into Customers With Rapid Follow-Up
Here’s the harsh truth: you can have perfect targeting, brilliant creative, and a flood of leads—but if you don’t follow up fast, you’re wasting money.
Leads contacted within 5 minutes are significantly more likely to convert than those contacted after 30 minutes. Why? Because people submit lead forms when they’re actively thinking about their problem. They might be comparing multiple businesses. The first one to respond often wins the business simply because they were first.
Set up instant lead notifications immediately. In your Lead Ad form settings, enable email notifications to go directly to whoever handles lead follow-up. Better yet, integrate your leads directly into your CRM using tools like Zapier or native integrations. This eliminates manual data entry and ensures leads don’t fall through the cracks.
Create a multi-touch follow-up sequence that combines calls, texts, and emails. Don’t rely on just one method—people have different communication preferences. Your sequence might look like this: immediate text acknowledging their inquiry, phone call within 15 minutes, follow-up email with additional information, second phone call if no answer, second text 24 hours later, final email 48 hours later.
Qualify leads quickly using a simple scoring system based on their form responses. If someone selected “Need service within 1 week” on your custom question, they’re hot—call them first. If someone selected “Just researching options,” they’re warm—follow up but don’t prioritize them over urgent leads. This prioritization ensures your best opportunities get attention first.
Track your lead-to-customer conversion rate religiously. This is the only metric that tells you if your Facebook campaigns are actually profitable. You might be generating leads at $25 each, which sounds expensive. But if 20% of those leads become customers worth $1,000 each, you’re making $200 for every $25 you spend. That’s a winner. If you’re dealing with inconsistent lead generation for small business, tracking these numbers reveals exactly where the breakdown occurs.
Calculate your numbers: total leads generated, total customers acquired, total revenue generated, total ad spend. This gives you your return on ad spend (ROAS). If you’re not tracking this, you’re flying blind.
Most businesses fail at Facebook lead generation not because their campaigns are bad, but because their follow-up is terrible. They let leads sit for hours or days. They send one email and give up. They don’t track what happens after the lead comes in. Don’t make this mistake. The lead is just the beginning—conversion happens in the follow-up.
Putting It All Together
Generating leads on Facebook isn’t about luck or having a massive budget. It’s about following a proven system that works.
You start by building your foundation: optimized Business Page, Meta Business Suite configured, Pixel tracking conversions, and domain verified. Without this infrastructure, nothing else works properly.
Then you define your audience with precision. You create Custom Audiences from people who already know you, build Lookalike Audiences to find similar prospects, and layer geographic and interest targeting to reach the right people in the right places.
You develop a compelling lead magnet that solves a real problem, write copy that speaks directly to pain points and desired outcomes, and create creative assets that stop the scroll and communicate value instantly.
You build your Lead Ad campaign with strategic form design that balances lead quality with conversion rates. You launch with appropriate testing budgets and monitor the metrics that actually matter: cost per lead, lead quality, and conversion rates.
Then you optimize relentlessly. You test audiences, creative, and copy systematically. You scale what works gradually while maintaining performance. You implement retargeting to capture engaged prospects who didn’t convert the first time.
Most importantly, you respond to leads fast. You set up instant notifications, create multi-touch follow-up sequences, qualify leads quickly, and track your lead-to-customer conversion rate to measure true ROI.
The businesses that win on Facebook are the ones that treat every lead like a potential customer walking through their door. They respond immediately. They follow up persistently. They track their numbers and make decisions based on data, not feelings.
Ready to stop guessing and start generating consistent leads? Use this checklist:
✓ Business Page optimized with Meta Pixel installed
✓ Custom and Lookalike audiences built
✓ Lead magnet and offer created
✓ Lead Ad campaign launched with proper tracking
✓ Follow-up system ready to respond instantly
Now go fill your pipeline.
Tired of spending money on marketing that doesn’t produce real revenue? We build lead systems that turn traffic into qualified leads and measurable sales growth. If you want to see what this would look like for your business, we’ll walk you through how it works and break down what’s realistic in your market.
Want More Leads for Your Business?
Most agencies chase clicks, impressions, and “traffic.” Clicks Geek builds lead systems. We uncover where prospects are dropping off, where your budget is being wasted, and which channels will actually produce ROI for your business, then we build and manage the strategy for you.