Most local business owners who try Google Ads end up in the same frustrating place: money draining out of their account, clicks that never turn into phone calls, and a campaign dashboard that looks like a tangled mess. The root cause is almost always the same — a poorly organized Google Ads campaign structure.
Your campaign structure is the foundation everything else sits on. It determines which searches trigger your ads, how much you pay per click, how relevant your ad copy is to the searcher, and ultimately whether your budget generates profitable leads or just vanishes.
When your structure is tight, every dollar works harder. When it’s sloppy, you’re essentially paying Google to send you junk traffic. Think of it like a well-organized toolbox versus a junk drawer. Everything looks similar from the outside, but when you actually need something, one setup gets the job done fast and the other wastes your time.
In this guide, we’re going to walk you through exactly how to build a Google Ads campaign structure from scratch. This is the same framework that separates businesses burning cash from businesses printing leads. Whether you’re an HVAC company, a plumber, an electrician, or any other local service provider, these steps apply directly to your business.
No fluff, no theory. Just the actionable process you can implement today. Let’s build this the right way.
Step 1: Define Your Campaign Goals and Budget Allocation
Before you touch a single keyword or write a single headline, you need to get clear on what you’re trying to accomplish with each campaign. This sounds obvious, but most business owners skip it entirely and end up with campaigns that are trying to do too many things at once.
For local service businesses, the answer is almost always the same: lead generation. You’re not trying to build brand awareness or educate the market. You want the phone to ring. Every campaign decision you make should be filtered through that lens.
Once you’re clear on the goal, the next question is budget. How much are you willing to spend per month, and how should that money be divided across your services? The answer isn’t to split it evenly. It’s to allocate based on two factors: service profitability and search demand.
Here’s a practical way to think about it. Start with your highest-value services. If you’re an HVAC company and a full system installation generates significantly more revenue than a tune-up, your installation campaign deserves a larger share of your budget. High-value services justify higher cost-per-lead targets because the math still works in your favor. For a deeper dive into how HVAC businesses specifically should approach this, check out our guide on Google Ads for HVAC companies.
Speaking of cost-per-lead targets, you need to set one before you launch. Work backward from your numbers. If your average job value is $800 and you close roughly one in four leads, you can afford to spend up to $200 per lead and still break even. Knowing this number prevents you from panicking when leads cost $80 and keeps you grounded when they cost $150.
The common pitfall to avoid: Dumping your entire budget into one catch-all campaign. This is the single most damaging structural mistake local businesses make. When all your services compete for the same budget, your highest-volume keywords eat all the spend and your most profitable services never get enough impressions to generate consistent leads. Separate campaigns give you real control.
Before moving to the next step, write down your top three to five services, assign a rough budget percentage to each based on profitability, and set a target cost-per-lead for each one. That document becomes your campaign blueprint.
Step 2: Organize Campaigns by Service Line or Location
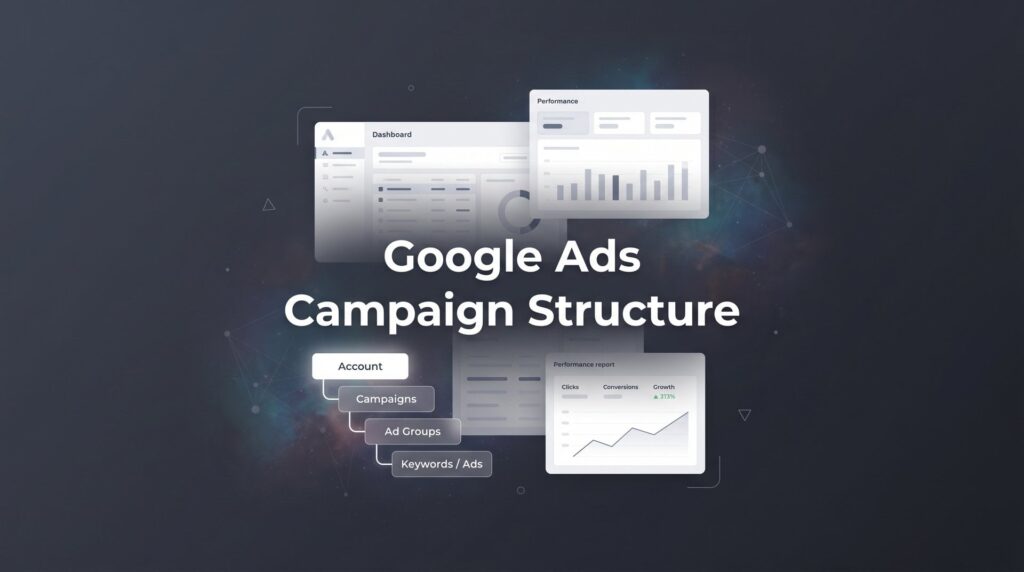
Here’s the golden rule of Google Ads campaign structure: one campaign per core service category. Not one campaign per business. Not one campaign per season. One campaign per service.
Why does this matter so much? Because campaign-level settings control your budget, your bid strategy, your location targeting, and your ad schedule. When you lump AC repair and AC installation into the same campaign, those settings apply to both services equally. But they shouldn’t. An emergency repair might justify a higher bid and a 24-hour ad schedule. An installation campaign might be better served with a narrower geographic radius and a daytime-only schedule when your sales team is available to answer calls.
Separate campaigns give you the ability to make those distinctions cleanly.
To make this concrete, picture a plumbing company with three core services: emergency plumbing, drain cleaning, and water heater installation. Here’s how their campaign structure should look. If you’re running a plumbing business, our resource on Google Ads for plumbers breaks down these campaign types in even more detail.
Emergency Plumbing Campaign: Higher bids, 24/7 ad schedule, tight local radius, aggressive budget allocation. People searching for emergency help are ready to buy right now, and the job values are high.
Drain Cleaning Campaign: Moderate bids, standard business hours schedule, slightly broader radius. Lower urgency, lower average job value, but high volume of searches.
Water Heater Installation Campaign: Competitive bids, daytime schedule, dedicated budget. High job value justifies premium cost-per-lead targets.
Each campaign operates independently. If the emergency plumbing campaign starts burning through budget too fast, you can dial it back without touching the other two. If drain cleaning is delivering leads at a great cost, you can increase its budget without affecting anything else. That level of control is impossible in a single catch-all campaign.
For businesses operating across multiple cities or a large service territory, geographic separation adds another layer. You might run a separate campaign for each major city or region, especially if competition levels and cost-per-click rates vary significantly between areas. A campaign targeting downtown searches might need higher bids than one targeting a suburban area, and keeping them separate lets you manage that difference precisely.
As a general rule: if a service has meaningfully different economics, a different audience, or a different search pattern, it deserves its own campaign.
Step 3: Build Tightly Themed Ad Groups Around Keyword Intent
If campaigns are the rooms in your house, ad groups are the furniture inside each room. They need to be organized, purposeful, and matched to the space they’re in.
Each ad group should contain a tight cluster of closely related keywords, typically somewhere between five and fifteen keywords that share the same core intent. The test is simple: would the exact same ad copy make sense for every keyword in this group? If the answer is yes, you have a well-built ad group. If the answer is no, you need to split it.
Here’s what a bloated ad group looks like in practice. Imagine an HVAC company that throws all of these into a single ad group: “AC repair,” “air conditioner not cooling,” “HVAC tune-up,” “AC installation cost,” “central air replacement,” and “AC maintenance near me.” These keywords represent completely different intents. Someone searching for “AC repair” wants a technician today. Someone searching “AC installation cost” is in research mode. Someone searching “AC maintenance” is planning ahead. A single ad can’t speak effectively to all three of those people.
A focused ad group for emergency repair intent might include: “AC repair near me,” “AC not working,” “emergency AC repair,” and “air conditioner repair same day.” Every one of those keywords gets the same ad, and that ad can be written specifically for someone whose AC just broke down. That specificity is what drives higher click-through rates and better Quality Scores. For a comprehensive look at how this principle applies across your entire account, read our guide on Google Ads account structure best practices.
Quality Score is Google’s internal rating of how relevant your keyword, ad, and landing page are to each other. Higher Quality Scores mean lower costs per click. When your ad groups are tightly themed, relevance goes up, Quality Scores improve, and you pay less for the same traffic. It’s one of the most direct ways that good structure saves you money.
Naming conventions matter more than you’d think. As your account grows, a clear naming system keeps everything manageable. A format like Campaign: Service Name and Ad Group: Specific Intent works well. For example, Campaign: AC Repair, Ad Group: Emergency Repair Intent. Campaign: AC Repair, Ad Group: Same Day Service. This makes it easy to navigate the account, pull reports, and spot problems quickly.
Take the time to map out your ad groups on paper before building them in the platform. It’s much easier to restructure a document than to restructure a live account.
Step 4: Select Keywords and Match Types Strategically
Keywords are where most local businesses either win or bleed money. The goal isn’t to find the most keywords. It’s to find the right keywords and control exactly when your ads show for them.
Start with phrase match and exact match. Exact match gives you the tightest control, showing your ads only for searches that closely match your keyword. Phrase match gives you a bit more reach while still maintaining relevance. Broad match, despite Google pushing it heavily, can drain local budgets fast. Without sophisticated negative keyword management and enough conversion data for smart bidding to work with, broad match often sends you traffic that looks related but converts poorly.
For local service businesses in the early stages of a campaign, stick to phrase and exact. You can always expand later once you have data.
To find the right keywords, use Google’s Keyword Planner as your starting point. Look for keywords with clear commercial intent. The difference between a buyer-ready keyword and an informational one is significant. “AC repair near me” signals someone ready to call. “How does an air conditioner work” signals someone curious, not ready to spend money. You want the former, not the latter.
Look at competitor ads too. Search your core services in Google and note which keywords appear in competitor headlines. Those are likely the high-intent terms worth targeting. This approach works especially well for trades like Google Ads for electricians, where emergency-intent keywords dominate the landscape.
Negative keywords are non-negotiable from day one. Before your campaign goes live, build a negative keyword list that blocks irrelevant searches. Common ones for local service businesses include: free, DIY, how to, jobs, career, salary, training, certification, YouTube, and Wikipedia. Add these at the campaign level so they apply across all ad groups.
Then keep adding. Your search term report will reveal what people actually typed when your ad showed. Review it weekly in the first month and add anything irrelevant to your negative list. This single habit can meaningfully reduce wasted spend.
Prioritize commercial intent above all else. Keywords that include words like “near me,” “cost,” “price,” “hire,” “service,” and “company” tend to signal someone ready to take action. Build your core keyword list around these terms and treat informational keywords as a secondary consideration, if you target them at all.
Step 5: Write Ad Copy That Matches Each Ad Group’s Intent
Here’s where your structural work pays off. Because you’ve built tightly themed ad groups, you can now write ad copy that speaks directly to the specific intent of each group. That specificity is what gets clicks and, more importantly, qualified calls.
Each ad group needs at least two to three responsive search ads. Google’s responsive search ads let you provide multiple headlines and descriptions, and the system tests combinations to find what performs best. Give it good material to work with by writing headlines that directly reflect the keywords in that group.
For an emergency AC repair ad group, your headlines might include: “24/7 Emergency AC Repair,” “Same-Day Service Available,” “Licensed HVAC Technicians,” and “Call Now for Fast Response.” Every headline is relevant to someone whose air conditioning just failed. That alignment between keyword and headline is what drives a strong click-through rate.
Include your differentiators in your descriptions. What makes you the obvious choice over the three other HVAC companies showing up on the same page? Response time, years in business, guarantees, licensing, financing options, five-star reviews — these details matter. Don’t waste description space on generic phrases like “great service at great prices.” Be specific: “Family-owned since 2003. Licensed, insured, and available 24/7.”
Pin your most critical headlines. Responsive search ads can show headlines in any combination unless you pin them. Pin your primary service headline to position one so it always appears. Pin your call to action to position three. This ensures the most important information is always visible regardless of which combination Google selects.
Use every available ad extension. Sitelinks let you add additional links below your ad, pointing to specific service pages or your contact page. Callout extensions let you add short trust-building phrases like “No Overtime Charges” or “Free Estimates.” Call extensions add your phone number directly to the ad on mobile, making it one tap to call. The same extension strategy applies across industries, from Google Ads for roofers to pest control companies — extensions consistently boost visibility and click-through rates.
Step 6: Align Landing Pages to Each Campaign or Ad Group
You’ve built a smart structure, chosen the right keywords, and written compelling ads. Now don’t throw it all away by sending everyone to your homepage.
Your homepage is designed for people who already know you and want to explore. It’s not designed to convert a stranger who just searched “emergency drain cleaning” at 11pm. That person needs to land on a page that immediately confirms they’re in the right place, shows them a phone number, and makes it dead simple to contact you. Your homepage does none of that efficiently.
Each campaign, and ideally each ad group, should point to a dedicated landing page that matches the searcher’s intent precisely. If someone searches “water heater replacement,” they should land on a page about water heater replacement, not your general plumbing services page. The message match between the ad and the landing page is what keeps people from bouncing and what converts clicks into calls. This principle holds true whether you’re running campaigns for a landscaping company or a locksmith — intent-matched landing pages always outperform generic ones.
Every high-converting landing page for local service businesses needs these elements:
A clear, specific headline: It should echo the search intent. “Fast Water Heater Replacement in [City]” is better than “Professional Plumbing Services.”
Phone number above the fold: Visible immediately, without scrolling. Make it click-to-call on mobile. This is non-negotiable.
Trust signals: Reviews, star ratings, licensing information, years in business, and any relevant badges or certifications. People making purchase decisions need reasons to trust you before they pick up the phone.
A simple contact form: Not a fifteen-field form. Name, phone number, and a brief message. Remove every point of friction you can.
Beyond conversion, landing page relevance directly impacts your Quality Score. Google evaluates how well your landing page matches the keyword and ad. A highly relevant landing page contributes to a higher Quality Score, which lowers your cost per click. Better structure literally saves you money at every level of the funnel.
Step 7: Launch, Monitor, and Refine Your Structure Over Time
The best campaign structure in the world is useless without proper tracking. Before you launch anything, set up conversion tracking. Full stop.
Conversion tracking tells Google what you actually care about: phone calls, form submissions, booked appointments. Without it, you have no idea which keywords, ad groups, or campaigns are generating real leads versus just burning budget. You also can’t use Google’s smart bidding strategies effectively because those systems optimize toward your conversion data. No data means no optimization.
Set up call tracking through Google Ads call extensions and website call tracking so that every phone call from an ad is recorded as a conversion. Set up form submission tracking so every lead form counts. This data becomes the foundation of every optimization decision you make going forward.
Once you launch, commit to weekly reviews for the first month. The most important report to check is your search terms report. This shows you the actual queries people typed when your ads showed. You will find irrelevant searches in there, sometimes surprising ones. Add them to your negative keyword list promptly. This weekly habit is the single highest-leverage activity in early campaign management.
Pause what isn’t working. After a few weeks of data, some ad groups or keywords will have spent meaningful budget without generating a single conversion. Pause them. Don’t let sentiment or hope keep money flowing to something that isn’t performing. Reallocate that budget to the campaigns and ad groups that are generating leads at an acceptable cost. If your account gets flagged during this process, our resource on Google Ads account suspended issues can help you navigate that situation.
Watch for signs your structure needs an overhaul:
Declining Quality Scores: If your scores are dropping, it often signals that your keywords, ads, and landing pages have drifted out of alignment. Tighten your ad groups or update your landing pages.
Rising cost per lead: If your CPL is climbing without a corresponding increase in lead quality, something in the structure is breaking down. Check for budget cannibalization between campaigns or ad groups that have grown too broad.
Budget imbalances: If one campaign is consistently hitting its daily budget while others barely spend, your allocation needs adjustment. Let the data guide the rebalancing, not gut instinct.
The goal isn’t to set up a perfect structure and leave it alone. The goal is to build a structure that makes continuous improvement easy and systematic.
Putting It All Together
A well-built Google Ads campaign structure is not a nice-to-have. It’s the difference between a lead generation machine and a money pit. Let’s recap what you’ve built across these seven steps.
You started by defining clear goals and setting realistic cost-per-lead targets based on your actual job economics. You organized campaigns by service line so each one has independent budget control and settings. You built tightly themed ad groups that keep keyword intent focused and Quality Scores high. You chose keywords with commercial intent and built a negative keyword list to block wasted spend from day one. You wrote ad copy that mirrors the specific intent of each ad group and used extensions to dominate the search results page. You aligned dedicated landing pages to each campaign so every click lands in the right place. And you set up conversion tracking before launch so every optimization decision is based on real data.
Follow these steps and you’ll have a structure that keeps your budget focused, your ads relevant, and your phone ringing with qualified leads.
But if building and managing all of this sounds like more than you want to handle on your own, that’s exactly what Clicks Geek does every day. As a Google Premier Partner agency, we build campaign structures designed to convert, not just collect clicks.
If you want to see what this would look like for your business, we’ll walk you through how it works and break down what’s realistic in your market. No pressure, no jargon. Just a clear picture of what a properly structured Google Ads account can do for your revenue.