Your Google Ads account structure is the foundation that determines whether your ad spend generates profitable leads or quietly drains your budget. A poorly organized account creates irrelevant clicks, inflated costs, and campaigns that compete against each other. A well-structured account gives you granular control over budgets, messaging, and bid strategies that drive real revenue.
Many local business owners launch Google Ads with a single campaign, a handful of ad groups stuffed with loosely related keywords, and then wonder why their cost per lead keeps climbing. The fix almost always starts in the same place: restructuring the account from the ground up.
Here’s the thing about Google Ads that most people miss. The platform is essentially an auction system that rewards relevance. When your account structure sends clear signals about what you offer, who you’re targeting, and what action you want people to take, Google rewards you with better placement at lower costs. When your structure is messy, Google fills in the gaps with its own assumptions, and those assumptions cost you money.
In this guide, we’ll walk you through Google Ads account structure best practices in a clear, sequential process. We’ll cover mapping your services, organizing campaigns, building tight ad groups, configuring the settings that prevent wasted spend, and establishing the ongoing habits that compound results over time. Whether you’re building a new account or overhauling an existing one, these steps will give Google’s algorithm the clarity it needs to put your ads in front of the right people at the right time.
Let’s get into it.
Step 1: Map Your Services and Revenue Goals Before Touching Google Ads
Before you log into Google Ads, open a spreadsheet. This step feels like homework, but skipping it is exactly how local business owners end up with bloated, unfocused campaigns that bleed budget without producing leads worth having.
Start by listing every service or product line you want to advertise. Be specific. If you’re a plumber, don’t just write “plumbing.” Write out “emergency plumbing,” “water heater installation,” “drain cleaning,” “sewer line repair,” and so on. Each distinct service category will eventually become its own campaign, and treating them as one homogenous blob makes it impossible to control where your money goes. For a deeper look at how this applies to a specific trade, see how we approach Google Ads for plumbers with service-level campaign separation.
Next, assign a revenue priority and approximate value to each service. This is where your business strategy has to inform your ad strategy. Emergency plumbing calls might be higher urgency and higher ticket than routine maintenance. A roofing company might prioritize full roof replacements over gutter cleaning. Your campaign budgets should reflect these priorities, not be distributed equally across everything you offer.
Ask yourself these questions for each service: What does a single converted lead typically earn me? How competitive is this service in my market? Is this a service I actually want more of right now, or am I already at capacity?
Then map your geographic service areas. This determines whether you need separate campaigns per location or can work with a single geo-targeted campaign. A business serving one city can often use one campaign with location targeting. A business serving multiple distinct metro areas, especially with different competitive landscapes or pricing, may benefit from location-specific campaigns so you can control bids and budgets regionally.
The common pitfall here is impatience. Jumping straight into keyword research without this foundation leads to campaigns that reflect whatever keywords popped into your head during setup, rather than campaigns built around your actual business priorities. You end up spending money on services with thin margins while your highest-value services get whatever budget is left over.
Success indicator: You have a clear spreadsheet mapping services to priority levels, estimated lead values, and target locations before you open a single Google Ads interface. That document becomes your blueprint for everything that follows.
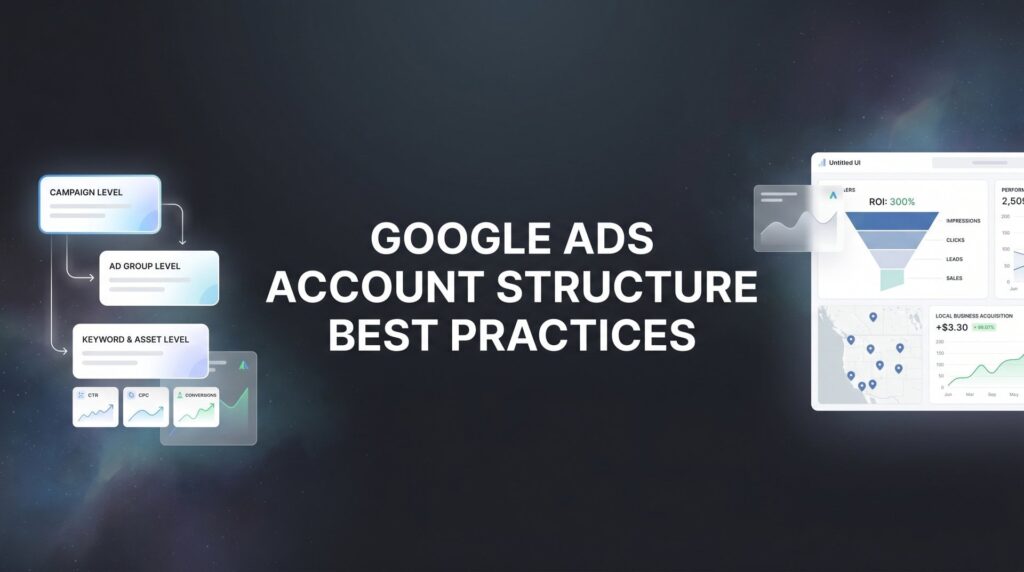
Step 2: Build Your Campaign Architecture Around Themes, Not Convenience
With your service map in hand, you’re ready to build your campaign architecture. The core principle here is simple: one campaign per major service category or business objective. Not one campaign for everything. Not one campaign because it’s easier to manage. One campaign per distinct service theme, each with its own budget and purpose.
Think about what this actually gives you. When Emergency Plumbing is its own campaign with its own daily budget, you control exactly how much you spend on those high-value calls. When it’s lumped into a catch-all “Plumbing Services” campaign alongside drain cleaning and water heater maintenance, Google decides how to distribute your budget across all of those. Spoiler: it won’t always prioritize what you’d prioritize.
Beyond service separation, you need to separate by network type. Search campaigns, Display campaigns, Performance Max campaigns, and remarketing campaigns should never share the same campaign. Mixing network types in a single campaign makes it nearly impossible to see what’s actually working. Your cost per click on Search is completely different from Display. Your conversion rate on Remarketing is completely different from cold Search traffic. Combine them and your performance data becomes meaningless noise.
For multi-location businesses, the decision between a single geo-targeted campaign versus location-specific campaigns comes down to budget and regional competition. If you have a meaningful budget to allocate per region and your markets have different competitive dynamics, separate campaigns give you the control to adjust bids and messaging by location. If your budget is modest, a single campaign with location targeting and bid adjustments by area is more practical.
Set individual daily budgets per campaign that reflect the priority ranking you established in Step 1. Your highest-margin services get the most budget. Services you’re testing or that are lower priority get a smaller allocation. This sounds obvious, but most accounts we see have budgets distributed almost randomly, with no connection to actual business value.
The pitfall to avoid is the mega-campaign. One campaign with all your services lumped together means Google’s algorithm decides where your money goes based on what it thinks will get clicks, not what will get you profitable leads. You lose visibility into what’s working and control over what to scale.
Success indicator: Every campaign in your account has a single, clear purpose. You can look at any campaign name and immediately know what service it covers, what network it runs on, and what budget it has. That clarity is what makes the rest of the structure work.
Step 3: Organize Ad Groups Into Tight, Intent-Matched Clusters
If campaigns are the chapters of your Google Ads account, ad groups are the paragraphs. Each one needs to cover a specific, focused topic, and every element inside it needs to belong together.
The guiding rule for ad groups is this: every keyword in an ad group should be answerable by the same ad copy and the same landing page. If you can’t write a single compelling ad that speaks directly to every keyword in a group, the group is too broad. Split it.
The old SKAG (Single Keyword Ad Group) approach has evolved. You don’t need one keyword per ad group, but you do need tight thematic clustering. A practical target is 5 to 15 keywords per ad group, all sharing the same core intent. For an electrician running an “Electrical Repair” campaign, the ad groups might look like this: “Outlet Repair,” “Circuit Breaker Repair,” “Electrical Panel Upgrade,” and “Wiring Repair.” Each gets its own ad copy that speaks directly to that specific problem, and each points to a landing page built around that specific service. You can see this approach in action in our guide to Google Ads for electricians.
One of the most important distinctions in ad group organization is separating informational keywords from transactional keywords. Someone searching “how much does electrical panel upgrade cost” is in research mode. Someone searching “electrical panel upgrade near me” is ready to call. These two people need different messages and often convert at very different rates. Mixing them in the same ad group dilutes your messaging and makes it impossible to bid appropriately for each intent level.
Here’s why this matters mechanically: Google calculates Quality Score partly based on the relevance between your keywords and your ad copy. When you have 50 loosely related keywords in one ad group, your ads can’t be highly relevant to all of them. Quality Score drops. Cost per click rises. Your ads show less frequently for the terms that actually matter. Tight ad groups solve this problem at the source.
A practical naming convention helps enormously here. Name your ad groups after the specific service or intent cluster they cover, not generic labels like “Ad Group 1” or “Main Keywords.” When you’re reviewing performance data at 7 AM before a client call, you need to instantly understand what each group represents.
Success indicator: You can look at any keyword in any ad group and immediately picture the specific ad headline that would speak to it. If you’re struggling to write an ad that fits all the keywords in a group, that’s your signal to split it further.
Step 4: Configure Campaign Settings That Prevent Budget Waste
Account structure is about more than campaigns and ad groups. The settings you configure inside each campaign either reinforce your structure or quietly undermine it. Several settings in particular have an outsized impact on whether your budget reaches the right people.
Location targeting: This is one of the most commonly misconfigured settings in local business accounts. Google defaults to “Presence or Interest,” which shows your ads to people who are searching about your target area, even if they’re physically located somewhere else. For most local service businesses, this is a budget drain. You want “Presence” only, meaning your ads show to people who are physically in your service area. Change this in every campaign.
Bid strategy: The right bid strategy depends on where you are in your account’s lifecycle. If you have meaningful conversion data (typically 30 or more conversions per month per campaign), Maximize Conversions with a target CPA gives Google’s algorithm enough signal to optimize effectively. If you’re starting fresh with no conversion history, Manual CPC gives you direct control while you build data. Jumping to automated bidding without conversion data is like asking someone to drive to a destination without giving them an address. Our guide to Google Ads optimization best practices covers bid strategy selection in more detail.
Ad scheduling: Run ads when your business can actually respond to leads. If you’re a service business that operates 7 AM to 7 PM and nobody answers the phone after hours, running ads at 2 AM wastes money on clicks that go nowhere. Review your historical conversion data by hour and day, then schedule your campaigns accordingly. You can also use bid adjustments to increase bids during your highest-converting time windows.
Device bid adjustments: Most local service businesses see heavy mobile conversion volume, particularly for phone calls. Check your device performance data and adjust bids upward for mobile if that’s where your leads are coming from. Don’t assume the default even split across devices is serving you well.
Negative keywords at campaign launch: Before your campaigns go live, add a foundational negative keyword list. At minimum, block terms like “free,” “DIY,” “how to,” “jobs,” “salary,” “careers,” “training,” “certification,” and any other terms that signal someone is not a buyer. These are universal exclusions that apply to virtually every local service business.
Success indicator: Your campaign settings actively filter out low-quality traffic before it costs you a single click. You’re not relying on the default settings Google chose for maximum reach; you’re choosing settings aligned with your actual business goals.
Step 5: Build Negative Keyword Lists That Scale Across Your Account
Negative keywords deserve their own step because they’re consistently underbuilt in most accounts. This is the single fastest way to reduce wasted ad spend, and it’s also one of the most neglected ongoing tasks in Google Ads management.
Start with a shared negative keyword list at the account level. This list contains universal exclusions that apply across every campaign: job-related terms (jobs, careers, hiring, salary, resume), DIY and informational terms (how to, tutorial, guide, free, cheap), and platform terms that often trigger irrelevant matches (YouTube, Reddit, Wikipedia). Apply this list to every campaign so you’re not rebuilding these exclusions from scratch each time you launch something new.
Beyond the account-level list, build campaign-specific negative keyword lists to prevent your own campaigns from competing against each other. This is called cross-campaign negatives, and it’s essential when you have multiple campaigns covering related services. Your “Water Heater Installation” campaign should have “repair” and “fix” added as negatives so those queries route to your separate “Water Heater Repair” campaign instead. Without this, your campaigns bid against each other in the same auction, driving up your own costs. If you’re running campaigns for a remodeling business, our Google Ads for home remodeling guide walks through cross-campaign negative strategy for multi-service contractors.
The place where your negative keyword list actually grows is the Search Terms report. This report shows you the actual queries that triggered your ads, and it’s full of surprises. Google’s broad match has expanded significantly in recent years, which means your ads can show for queries that are semantically related but not actually relevant to your business. Weekly search term reviews for the first 90 days of any new campaign are non-negotiable. You’ll find irrelevant queries you never would have anticipated and add them to your negative lists before they accumulate significant spend.
A practical workflow: Every week, filter your Search Terms report for the past seven days, sort by cost, and review any query that spent money without converting. Add irrelevant terms to the appropriate negative list. This takes 20 to 30 minutes but directly improves the efficiency of every dollar you’re spending.
Success indicator: Your Search Terms report shows queries that closely match your intended services with minimal irrelevant traffic appearing. Over time, this ratio should improve as your negative lists grow more comprehensive.
Step 6: Align Ad Copy and Landing Pages to Your Account Structure
All the structural work you’ve done in the previous steps creates the conditions for relevance. This step is where you cash in on that relevance by writing ad copy and building landing pages that speak directly to each ad group’s specific intent.
Generic ads that try to cover everything convert poorly. An ad that says “Professional Plumbing Services – Call Now” is far less compelling to someone searching “circuit breaker keeps tripping” than an ad that says “Circuit Breaker Repair – Same Day Service – Licensed Electricians.” The more specifically your ad copy mirrors the searcher’s intent, the higher your click-through rate, and the higher your Quality Score.
Create at least three responsive search ad variations per ad group. Use unique headlines that include the ad group’s primary keyword, your location or service area, and a specific value proposition or call to action. Google’s responsive search ad format tests combinations automatically, but the quality of the inputs determines the quality of the outputs. Give it strong, varied headlines rather than slight variations of the same phrase.
Every ad group should point to a dedicated landing page, not your homepage. Your homepage is designed to introduce your entire business. A landing page for “Drain Cleaning Services” is designed to convert someone who needs their drain cleaned right now. These are different jobs, and using your homepage for everything is one of the most common conversion killers in local business advertising.
Use every available ad extension. Sitelinks give searchers additional paths to relevant pages. Callout extensions highlight specific benefits like “24/7 Emergency Service” or “Licensed and Insured.” Structured snippets let you list specific services. Call extensions put your phone number directly in the ad. Location extensions show your address. Each extension increases your ad’s real estate on the search results page and gives potential customers more reasons to choose you over a competitor.
The mechanical reason this matters: Google’s Quality Score is calculated based on three factors: expected click-through rate, ad relevance, and landing page experience. Tight alignment between keyword, ad copy, and landing page directly improves all three. Higher Quality Scores mean lower cost per click and better ad positions, which compounds across your entire account.
Success indicator: Your Quality Scores average 7 or above across your account, and your landing page experience ratings show “Above Average” in Google’s interface. These aren’t vanity metrics; they directly affect what you pay per click.
Step 7: Set Up Conversion Tracking and an Ongoing Optimization Cadence
A perfectly structured account with no conversion tracking is a car with no dashboard. You’re driving blind, unable to tell whether you’re moving toward your destination or away from it.
Install conversion tracking for every lead type your business generates: phone calls from ads, phone calls from your website, form submissions, chat inquiries, and any other action that represents a potential customer reaching out. Google Ads provides native conversion tracking for calls directly from ads. For website actions, Google Tag Manager is the cleanest implementation method, giving you flexibility to add and modify tracking without touching your website’s code directly.
When setting up conversions, distinguish between primary and secondary conversion actions. Primary conversions are the actions you want Smart Bidding to optimize toward, typically your highest-intent lead types like phone calls and form submissions. Secondary conversions are supporting signals like page views or time on site. Feeding Smart Bidding the wrong primary conversion (like a page view instead of a form submission) will cause it to optimize for the wrong behavior and waste your budget chasing low-value actions. If your account has ever been flagged or paused due to policy issues during setup, our resource on Google Ads account suspended issues can help you get back on track.
Once your tracking is in place and your account is live, structure your optimization around a consistent cadence. Weekly reviews should cover search terms, ad performance, and any keywords spending money without converting. This is also when you catch new negative keyword opportunities and test ad copy variations. Monthly reviews should zoom out to campaign-level performance: which campaigns are delivering leads at your target cost, which are underperforming, and how budget should be reallocated to reflect what the data is showing.
The pitfall that kills otherwise well-structured accounts is treating the build as a one-time project. Account structure is the foundation, but ongoing management is what compounds results. Google’s auction dynamics change. Competitor behavior shifts. Seasonality affects search volume. An account that’s optimized today needs attention next month to stay optimized.
Success indicator: You can trace every lead back to the exact campaign, ad group, and keyword that generated it. You know your cost per lead by service category, you know which campaigns are profitable, and you have enough data to make confident decisions about where to scale and where to cut.
Putting It All Together: Your Pre-Launch Checklist
A well-structured Google Ads account isn’t a one-time project. It’s the operating system that makes every dollar of ad spend work harder. By mapping your services first, building theme-based campaigns, organizing tight ad groups, locking down your settings, layering in negative keywords, aligning your ads and landing pages, and committing to ongoing optimization, you create a system that consistently delivers qualified leads at a profitable cost.
Before you launch, run through this checklist:
Services mapped: Every service has a priority level, estimated lead value, and target location documented before any campaign is built.
Campaign architecture set: Separate campaigns per service category, separate campaigns per network type, and individual daily budgets aligned to revenue priorities.
Ad groups organized: Each ad group contains 5 to 15 intent-matched keywords that could all be answered by the same ad and landing page.
Settings configured: Location targeting set to “Presence” only, bid strategy matched to your data availability, ad schedule aligned to business hours, and foundational negative keywords added.
Negative keyword lists built: Account-level universal exclusions applied to all campaigns, plus campaign-specific cross-negatives to prevent internal competition.
Ad copy and landing pages aligned: Every ad group has dedicated ad copy matching its keyword theme, and every ad points to a landing page built for that specific service and intent.
Conversion tracking verified: Every lead type is tracked, primary conversions are correctly designated, and you can confirm data is flowing into Google Ads before spending begins.
If restructuring your account feels overwhelming, or you’d rather have experts build it correctly from day one, Clicks Geek specializes in building high-performance Google Ads accounts for local businesses. As a Google Premier Partner agency, we build account structures designed to convert, not just generate clicks. If you want to see what this would look like for your business, we’ll walk you through how it works and break down what’s realistic in your market.