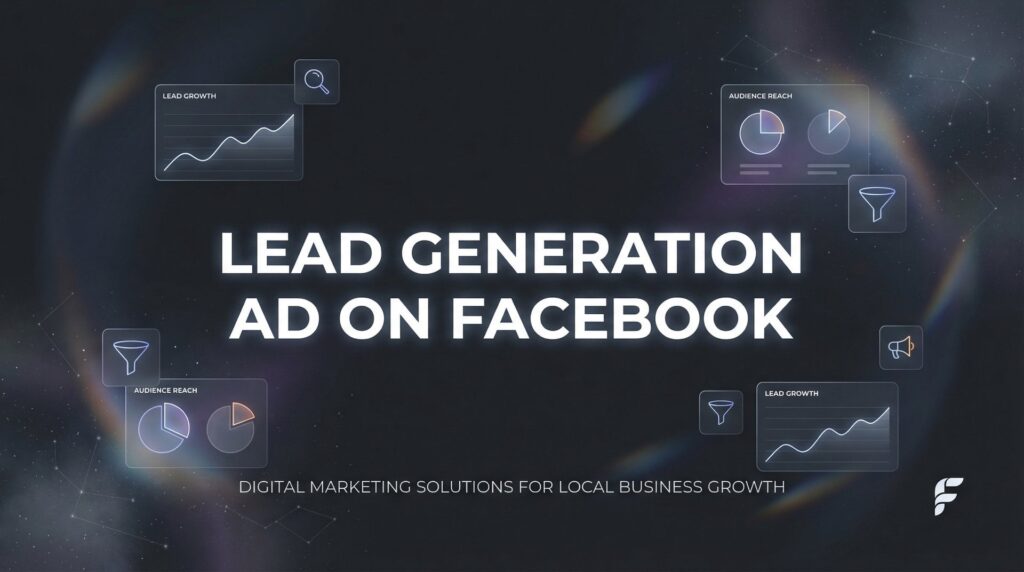
You’ve probably been there: watching your Facebook ad budget drain while your phone stays silent. The clicks look good in the dashboard, but actual leads? Crickets. Here’s what most local business owners don’t realize: the problem isn’t Facebook advertising itself—it’s how you’re asking people to convert.
Traditional Facebook ads send people to your website, where they have to navigate around, find your contact form, and manually type in all their information. Each of those steps is a chance for them to change their mind, get distracted, or simply give up. Facebook lead generation ads eliminate that friction entirely by letting people submit their information without ever leaving the platform.
Think about it: Facebook already knows their name, email, phone number, and location. With lead ads, all that information gets pre-filled automatically. One tap, and they’re done. No new pages to load, no forms to fill out from scratch, no reasons to abandon the process halfway through.
This isn’t just convenient—it’s a completely different conversion mechanism. And when you set it up correctly, it becomes one of the most efficient ways to capture qualified leads for local businesses.
What you’re about to learn is the exact process we use to build Facebook lead generation campaigns that actually produce phone calls and appointments. Not vanity metrics. Not engagement. Real leads that turn into revenue. We’ll walk through every decision point, from choosing the right campaign objective to optimizing your instant form for maximum conversions. By the end, you’ll have a clear roadmap to launch a campaign that captures leads while you sleep.
Step 1: Set Up Your Campaign with the Right Objective
Here’s where most people mess up before they even get started: they choose the wrong campaign objective. Facebook’s algorithm optimizes your ads based on the objective you select, so if you choose “Traffic” or “Engagement,” you’ll get clicks and likes—but not necessarily leads.
Log into Meta Ads Manager and click the green “Create” button. When the objective selection screen appears, scroll down and select “Leads.” This tells Facebook’s algorithm to show your ads to people who are most likely to fill out forms, not just click or engage.
Why does this matter so much? Facebook has billions of data points about user behavior. It knows which users tend to submit forms and which ones just browse. When you select the Leads objective, the algorithm prioritizes showing your ad to the form-fillers. Choose Traffic instead, and you’ll get cheap clicks from people who have no intention of converting.
Next, you’ll see conversion location options: Instant Forms, Messenger, Phone Calls, or Website. For most local businesses, Instant Forms is your best bet. This is Facebook’s native lead capture system—the form appears directly in the Facebook app when someone clicks your ad. No external pages, no loading times, no friction.
Messenger works well if you have someone actively managing conversations in real-time, but it requires immediate response capability. Phone Calls can work for service businesses where talking to someone is part of the sales process, but you’ll pay for every call whether it’s qualified or not. Website conversions defeat the entire purpose of reducing friction.
Stick with Instant Forms unless you have a specific reason not to.
Before moving forward, name your campaign something you’ll recognize three months from now when you’re looking at reports. Use a naming convention that includes the offer, location, and date. Something like “Lead-Gen_HVAC-Repair_Austin_March2026” beats “Campaign 1” every time. Your future self will thank you when you’re trying to figure out which campaign drove those 47 leads last quarter.
Step 2: Define Your Ideal Audience with Precision Targeting
This is where lead quality gets determined. You can have the perfect ad and a flawless form, but if you’re showing it to the wrong people, you’ll generate leads that never convert to customers.
Start with location targeting. For local businesses, you have two main options: radius targeting or zip code targeting. Radius targeting lets you draw a circle around your business location—useful if you serve a specific geographic area. Zip code targeting gives you more control if certain neighborhoods are better fits for your services.
Here’s what actually works: if you’re targeting a major metro area, start with a 15-25 mile radius and refine based on performance. If you’re in a smaller market, you might need to expand to 30-40 miles to reach enough people. The goal is balancing audience size with service area reality. There’s no point generating leads from people 50 miles away if you won’t drive that far for a job.
Now layer in demographics. Age ranges matter more than most people think. If you’re selling retirement planning, showing ads to 25-year-olds wastes money. If you’re marketing college prep tutoring, targeting 55-65-year-olds makes sense only if you’re going after grandparents. Be specific.
Interests and behaviors add another targeting dimension. Facebook knows an incredible amount about what people like, what they buy, and what they engage with. If you’re a landscaping company, target homeowners interested in home improvement, gardening, and outdoor living. If you’re a personal injury attorney, target people interested in legal services and consumer rights.
The question everyone asks: should you use Custom Audiences, Lookalike Audiences, or cold targeting?
Custom Audiences: These are people who’ve already interacted with your business—website visitors, email subscribers, past customers. Use these for retargeting campaigns, not initial lead generation. You already have their contact info in most cases.
Lookalike Audiences: Facebook creates these based on your existing customers or leads. If you have at least 100 quality leads or customers, create a lookalike audience and target it. Facebook will find people who share characteristics with your best customers. This often outperforms cold targeting significantly.
Cold Targeting: This is everyone else—people who match your demographic and interest criteria but haven’t interacted with you before. Start here if you don’t have enough data for lookalikes yet.
What about audience size? Facebook will show you a gauge indicating whether your audience is too specific or too broad. For lead generation campaigns targeting local businesses, aim for at least 50,000-200,000 people in your target audience. Smaller than 50,000 and you’ll exhaust the audience quickly, driving up costs. Larger than 500,000 and you’re probably not being specific enough.
One more critical step: exclusion targeting. Create a Custom Audience of your existing customers and exclude them from your lead generation campaigns. Why pay to capture information you already have? This single step can reduce your cost per lead by 20-30% immediately.
Step 3: Choose Placements and Set Your Budget Strategically
Facebook wants you to use Advantage+ Placements, which means letting the algorithm decide where to show your ads across Facebook, Instagram, Messenger, and Audience Network. For lead generation campaigns, this usually works well because the algorithm will naturally favor placements that drive form submissions.
That said, if you have data showing certain placements underperform, manual selection makes sense. Instagram Stories often drive lower-quality leads than Facebook Feed for service businesses. Audience Network—Facebook’s off-platform ad network—can deliver cheap leads that rarely convert. Start with Advantage+ Placements, monitor performance by placement, then adjust if needed.
Now for budget decisions. You have two options: daily budget or lifetime budget. Daily budget spends up to your specified amount each day. Lifetime budget distributes your total budget across your campaign duration, spending more on high-performing days and less on slow days.
For lead generation campaigns, daily budgets provide more control and predictability. Set a daily budget you’re comfortable spending indefinitely, because successful campaigns should run continuously, not start and stop.
How much should you actually spend? This depends entirely on your market, competition, and lead value. In competitive markets like legal services or home services, expect to pay $15-50 per lead. In less competitive niches, you might see $5-15 per lead. Understanding what lead generation services actually cost helps you set realistic budget expectations from the start.
Here’s the math: if you estimate $20 per lead based on your industry, a $100 daily budget should generate about 5 leads per day, or 150 leads per month. That’s enough volume to evaluate quality and optimize your approach. Starting with $20-30 per day means waiting weeks to gather meaningful data.
For bid strategy, stick with “Lowest Cost” when you’re starting out. This tells Facebook to get you the most leads possible within your budget. Once you have performance data and know your acceptable cost per lead, you can switch to “Cost Cap” to maintain quality while scaling. Cost Cap tells Facebook not to spend more than your specified amount per lead, which prevents cost inflation as you scale.
Step 4: Create Ad Creative That Stops the Scroll
Your targeting can be perfect, but if your creative doesn’t make people stop scrolling, none of it matters. Facebook users are moving fast through their feeds—you have maybe one second to catch their attention.
Format selection comes first: image, video, or carousel? Each has strategic uses. Single images work well for straightforward offers with clear value propositions. Videos outperform images for complex services that benefit from explanation or demonstration. Carousels let you showcase multiple benefits or different service offerings in one ad.
For most local service businesses, high-quality images or short videos (15-30 seconds) drive the best results. The key is showing something relevant to your audience’s pain point. An HVAC company showing a family comfortable in their home during summer heat. A dentist showing confident smiles. A landscaper showing a transformed yard.
Avoid stock photos that look like stock photos. People scroll past generic imagery instantly. Use real photos of your work, your team, or your actual customers (with permission). Authenticity beats polish when it comes to lead generation.
Your headline needs to create curiosity or promise a specific benefit. Generic headlines like “Contact Us Today” generate mediocre results. Headlines that speak to a specific outcome work better:
“Get Your Free AC Tune-Up Before Summer Hits” beats “HVAC Services Available”
“See How Much Your Home Is Really Worth” beats “Real Estate Agent”
“Free Roof Inspection After Recent Storms” beats “Roofing Company”
Notice the pattern? Specificity and value. Tell people exactly what they’re getting and why they should care right now.
Your primary text—the copy above the image—should follow a simple structure: hook, value proposition, call-to-action. Start with something that resonates with your target audience’s current situation. Then explain what you’re offering and why it matters. End with a clear instruction on what to do next.
Here’s what this looks like in practice: “Your AC shouldn’t sound like a freight train. If you’re hearing strange noises, grinding, or squealing, you’re probably looking at an expensive repair soon—unless you catch it early. We’re offering free diagnostic checks this month for Austin homeowners. Find out what’s wrong before it becomes a $3,000 problem. Click below to schedule your free inspection.”
That’s hook (strange noises), value proposition (free diagnostic), and call-to-action (click to schedule) in four sentences.
One critical principle: congruence. Your ad creative must match your offer and your instant form. If your ad promises a “free estimate,” your form better be collecting information for an estimate, not trying to sell something. Mismatched messaging kills conversion rates because people feel deceived.
Remember that most people will see your ad on mobile devices. Design with mobile in mind. Text should be readable without zooming. Important elements shouldn’t be cut off in mobile crop. Test how your ad looks on a phone before launching.
Step 5: Build a High-Converting Instant Form
This is where lead quality and lead volume get balanced. Your instant form design directly determines both how many people submit and how qualified those leads are. Get this wrong, and you’ll either have too few leads or too many junk leads that never convert.
First decision: form type. Facebook offers two options—More Volume or Higher Intent. This isn’t a minor setting; it fundamentally changes how the form works.
More Volume forms are shorter and faster. People see a few pre-filled fields, tap submit, and they’re done. This maximizes the number of leads you capture but often reduces quality because there’s no friction to filter out casual inquiries.
Higher Intent forms add a review step. After someone fills out the form, they see a summary screen where they can review and edit their information before final submission. This extra step reduces form completion rates by roughly 20-30%, but the leads you do get tend to be more serious because they’ve confirmed their interest twice.
Which should you choose? If you’re selling high-ticket services where lead quality matters more than volume—think legal services, major home renovations, or B2B services—use Higher Intent. If you’re capturing leads for lower-commitment offers where you can qualify leads through follow-up, More Volume works better. Many businesses dealing with poor quality leads from marketing find that switching to Higher Intent forms dramatically improves their conversion rates.
Now for the fields you’ll include. Facebook lets you choose from pre-filled fields (pulled from the user’s profile) and custom questions (which users must answer manually). Every field you add reduces completion rates, so be strategic.
Essential fields for most businesses: full name, email address, phone number. That’s the minimum you need for follow-up. Location (city or zip code) makes sense for local businesses to ensure leads are in your service area.
Common mistake: asking for too much information. Do you really need to know their job title, company size, and annual revenue before you’ve even talked to them? Probably not. Each additional field is a chance for people to abandon the form. Stick to information you absolutely need for initial contact and qualification.
Custom questions serve two purposes: qualifying leads and gathering information that helps your sales process. A roofing company might ask “When was your roof last replaced?” to gauge urgency. A personal trainer might ask “What’s your primary fitness goal?” to personalize follow-up. These questions work when they’re quick to answer and clearly relevant to the offer.
Multiple choice questions work better than open text fields because they’re faster to complete on mobile. If you must use open text, keep it optional or make it the last field so people who abandon don’t cost you their contact information.
The intro section appears at the top of your form. This is your chance to reinforce the value of what you’re offering. Don’t waste it with generic text like “Fill out the form below.” Remind people why they clicked: “Get your free home value estimate in less than 24 hours. No obligation, no pressure—just honest information about what your property is worth in today’s market.”
Your thank you screen matters more than you think. This is the last thing people see, and it sets expectations for what happens next. Be specific about next steps: “Thanks! We’ll text you within 15 minutes to schedule your free estimate.” Or “Your report will arrive by email within 2 hours. Check your inbox!”
Vague thank you messages like “We’ll be in touch soon” create uncertainty. When will they hear from you? How will you contact them? What should they expect? Answer these questions clearly.
One non-negotiable requirement: your privacy policy. Facebook requires a link to your privacy policy on every lead form. This isn’t optional. If you don’t have a privacy policy on your website, create one before launching lead ads. There are templates available, or you can hire someone to draft one that complies with current regulations. Link to it in the privacy policy field of your form settings.
Step 6: Connect Your CRM and Set Up Lead Notifications
Here’s a stat that should terrify you: companies that contact leads within 5 minutes are 100 times more likely to qualify the lead than those who wait 30 minutes. Wait an hour, and your odds drop even further. Wait until the next day, and you might as well not follow up at all.
This is why CRM integration isn’t optional—it’s the difference between a lead generation system that produces revenue and one that produces a spreadsheet of names you’ll never call.
Facebook’s native lead center (where leads are stored if you don’t integrate) is terrible for actual lead management. Leads sit there until you manually download a CSV file and import them somewhere else. By that time, your potential customers have already called three of your competitors who responded faster.
You have several integration options, depending on your CRM.
Native integrations work through Facebook’s lead access settings. Major CRMs like Salesforce, HubSpot, and Zoho have direct integrations. Go to your Facebook Business Settings, click on “Lead Access,” and you’ll see a list of integrated partners. If your CRM is listed, connect it directly. Leads will flow automatically from Facebook to your CRM within minutes of submission.
If your CRM isn’t on Facebook’s integration list, use Zapier or Make (formerly Integromat). These automation platforms connect Facebook Lead Ads to virtually any CRM or database. You create a “zap” or “scenario” that triggers when a new lead comes in, then automatically sends that lead’s information to your CRM. Exploring the best lead generation tools available can help you find the right automation stack for your business.
The setup takes about 15 minutes. Create an account with Zapier or Make, connect your Facebook account, select your lead form, connect your CRM, map the fields (name goes to name field, email goes to email field, etc.), and turn it on. Test it thoroughly before launching your campaign.
CRM integration solves data flow, but it doesn’t solve immediate notification. Your sales team needs to know the second a lead comes in. Set up instant notifications through your CRM if it supports them, or create a separate automation that sends an email or SMS to your sales team when a new lead arrives.
Here’s what works well: a Slack notification that pings your sales channel with the lead’s name, phone number, and details. Or an SMS to your sales rep’s phone with the same information. Make it impossible to miss a new lead.
Before you launch, test everything. Submit a test lead through your form using your own information. Verify it appears in your CRM within a few minutes. Confirm notifications are working. Call the phone number in the CRM to make sure it’s formatted correctly. Check that all fields mapped properly.
One test lead now prevents dozens of lost leads later when you discover your integration wasn’t working and you’ve been collecting leads in Facebook’s lead center for two weeks without knowing it.
Step 7: Launch, Monitor, and Optimize for Better Results
You’ve built everything. Now it’s time to launch. But before you hit that publish button, run through this pre-launch checklist:
Verify your campaign objective is set to Leads. Check your audience targeting—location, demographics, interests all correct? Confirm your budget is set to an amount you’re comfortable spending daily. Review your ad creative one more time for typos or errors. Test your instant form by submitting your own information. Confirm your CRM integration is working and notifications are set up.
Everything checks out? Launch the campaign.
Now comes the hard part: patience. Facebook’s algorithm needs time to learn. During the first 48-72 hours, your cost per lead might be higher than expected, your delivery might be inconsistent, and your results might look disappointing. This is normal. The algorithm is testing different users, placements, and delivery times to figure out what works.
Resist the urge to make changes during this learning phase. Every time you edit your campaign significantly, you reset the learning process. Let it run for at least 3-5 days before making major adjustments.
What should you actually monitor? Focus on these key metrics:
Cost Per Lead: What you’re paying for each form submission. Track this daily, but evaluate it weekly. One expensive day doesn’t mean your campaign is broken.
Lead Quality: This is harder to measure in Ads Manager but infinitely more important. Are these leads answering their phones? Do they remember submitting the form? Are they actually in your service area and interested in what you offer? Track this in your CRM, not Facebook.
Form Completion Rate: What percentage of people who open your form actually submit it? If this is below 20%, your form is too long or asking for too much information. If it’s above 60%, you might not be qualifying leads enough.
Conversion Rate: Of the leads you capture, how many become customers? This is the metric that actually matters for your business. A campaign generating 50 leads at $10 each sounds great until you realize only one became a customer. A campaign generating 10 leads at $30 each where five became customers is objectively better.
When should you make changes? If after 5-7 days your cost per lead is 2-3x what you expected and your lead quality is poor, something needs adjustment. Start with your audience—try narrowing or expanding your targeting. Then test different ad creative. Finally, adjust your form if completion rates are unusually low.
When should you leave it alone? If you’re getting leads at an acceptable cost and some of them are converting to customers, the campaign is working. Optimization at this point means testing variations, not overhauling everything.
A/B testing drives continuous improvement. Create duplicate campaigns or ad sets where you change one variable at a time. Test different images. Try different headlines. Experiment with form length. Compare Higher Intent vs. More Volume forms. Run these tests for at least a week to gather meaningful data, then keep the winner and test something else.
Signs your campaign needs immediate attention: cost per lead increasing dramatically over several days, form completion rate dropping below 15%, leads coming from outside your service area, or leads consistently not answering follow-up calls. These indicate targeting problems, form issues, or ad creative that’s attracting the wrong people.
Signs of success: consistent lead flow at predictable costs, leads answering phones and confirming they submitted the form, reasonable percentage of leads converting to customers, and stable or decreasing cost per lead over time as the algorithm optimizes. If you’re still experiencing inconsistent lead generation results, systematic A/B testing usually reveals the bottleneck.
Your Complete Facebook Lead Generation Campaign Checklist
You now have the complete framework for building Facebook lead generation ads that actually work. Let’s recap the seven steps so you have a quick reference:
Step 1: Set up your campaign with the Leads objective and choose Instant Forms as your conversion location. Name your campaign clearly for future tracking.
Step 2: Define your audience with precise location targeting, relevant demographics and interests, and exclusions for existing customers. Aim for 50,000-200,000 people in your target audience.
Step 3: Choose Advantage+ Placements to start, set a daily budget that allows for meaningful testing (enough for 3-5 leads per day minimum), and use Lowest Cost bid strategy initially.
Step 4: Create mobile-optimized ad creative with authentic imagery, specific benefit-driven headlines, and primary text that hooks attention and clearly explains your offer.
Step 5: Build your instant form with the appropriate type (More Volume vs. Higher Intent), minimal required fields, custom questions that qualify without overwhelming, and clear next steps on the thank you screen.
Step 6: Connect your CRM through native integration or automation tools, set up instant notifications for your sales team, and test everything before launching.
Step 7: Launch your campaign, let it run through the learning phase without major changes, monitor cost per lead and lead quality, and optimize through systematic A/B testing.
The real power of Facebook lead generation ads isn’t just in the setup—it’s in what you do with the leads once they come in. The fastest follow-up wins. The businesses that respond within minutes, not hours or days, convert at exponentially higher rates. Your lead generation campaign is only as good as your follow-up system.
That means having someone ready to call or text leads immediately. It means having a script or system for qualifying leads quickly. It means tracking which leads came from which campaigns so you can optimize based on actual revenue, not just lead volume.
When you combine a properly structured Facebook lead campaign with immediate, professional follow-up, you create a predictable lead generation system. Not a one-time experiment. Not a campaign you run for a month and abandon. A consistent source of qualified prospects who’ve already expressed interest in what you offer.
Tired of spending money on marketing that doesn’t produce real revenue? We build lead systems that turn traffic into qualified leads and measurable sales growth. If you want to see what this would look like for your business, we’ll walk you through how it works and break down what’s realistic in your market.
Want More Leads for Your Business?
Most agencies chase clicks, impressions, and “traffic.” Clicks Geek builds lead systems. We uncover where prospects are dropping off, where your budget is being wasted, and which channels will actually produce ROI for your business, then we build and manage the strategy for you.