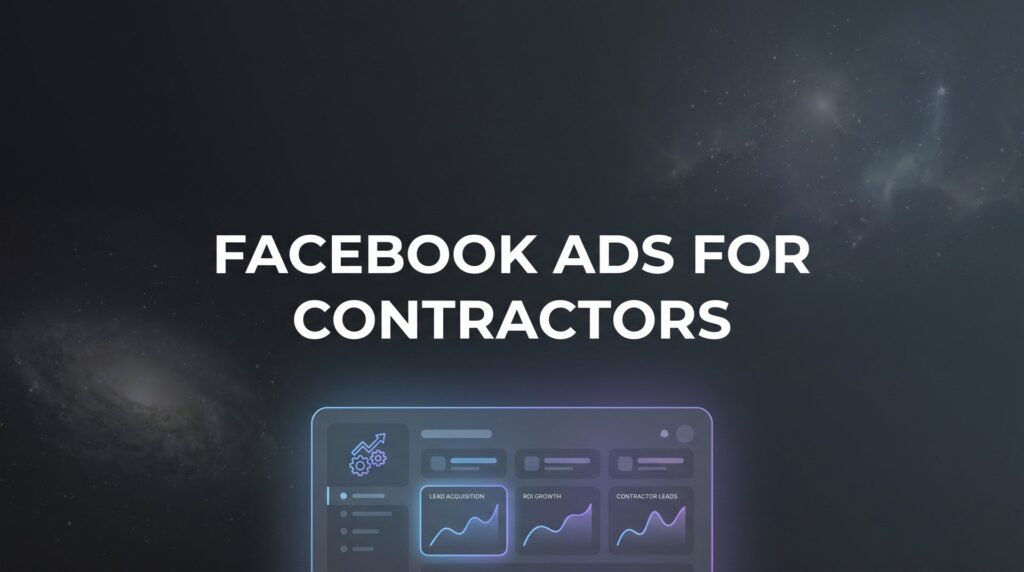
Most contractors already know they need to be marketing online. The question is where to put the money. Google Ads gets a lot of attention because it captures people actively searching for services, but Facebook offers something different and, in many ways, more powerful for local contractors: the ability to find homeowners in your service area before they’ve even started shopping around.
Think about it this way. A Google search happens when someone already knows they have a problem. Facebook lets you reach the homeowner who’s been pinning kitchen remodels for three months, or the one who just moved into a fixer-upper and is starting to think about what needs to happen first. You’re not just answering demand. You’re creating it.
The problem isn’t that Facebook ads don’t work for contractors. It’s that most contractors set them up wrong. They boost a post from their personal page, target a vague radius, and send clicks to a homepage that wasn’t built to convert. Then they conclude Facebook doesn’t work and go back to relying on referrals.
This guide is the antidote to that. Whether you’re a roofer, general contractor, HVAC tech, remodeler, or home services pro of any kind, you’ll find a complete system here for building Facebook ad campaigns that fill your pipeline with qualified leads. We’ll cover everything from the technical setup to the creative strategy to what happens after someone clicks. By the end, you’ll have a clear launch plan you can put into action this week.
No fluff. No vague advice. Let’s get to work.
Step 1: Build Your Foundation — Business Manager, Pixel, and Conversion Tracking
Before you spend a single dollar on ads, the infrastructure needs to be right. Skipping this step is one of the most expensive mistakes contractors make because without proper tracking, you’re flying blind and optimizing based on guesswork.
Set up Meta Business Manager first. Go to business.facebook.com and create a Business Manager account if you don’t already have one. This is different from simply boosting posts from your personal Facebook profile. Business Manager gives you full control over your ad account, pixel data, and page access. It also means your business assets are owned by your business, not tied to a personal account that could get locked out. If you ever bring on a marketing partner or agency, this is how you give them access without handing over your personal login.
Install the Meta Pixel on your website. The Pixel is a small piece of code that tracks what visitors do after clicking your ads. Inside Business Manager, go to Events Manager, create a Pixel, and install it on your website. Most website platforms (WordPress, Wix, Squarespace) have direct integrations that make this straightforward. Once it’s installed, configure standard events: specifically, you want to track Lead events (form submissions), Contact events (click-to-call button taps), and SubmitApplication if you use a multi-step quote form.
Add the Conversions API. Browser privacy changes, particularly around iOS and cookie restrictions, have made pixel-only tracking less reliable. The Conversions API sends conversion data directly from your server to Meta, bypassing browser limitations. This gives you more accurate data, which means better optimization. Your web developer can set this up, or you can use a platform integration like the one available through WordPress plugins or Zapier-connected CRM workflows.
Verify your domain. In Business Manager, go to Brand Safety and verify your website domain. This is a quick step that prevents ad delivery issues and is required if you want to use custom conversions tied to your website.
Your success indicator for this step: submit your own contact form on your website, then go to Events Manager and confirm you see a test event fire. If you see it there, your tracking is live and working.
Step 2: Define Your Ideal Customer and Nail Your Targeting
Here’s where a lot of contractor campaigns fall apart. Broad targeting feels safe because it reaches more people, but for a local service business, it’s the fastest way to burn through budget with nothing to show for it. You don’t need to reach everyone in your metro area. You need to reach homeowners in your service area who have the income and the motivation to hire you.
Start with location targeting. In your ad set, set your location to either a radius around your business address or a list of specific zip codes you serve. For most contractors, a 20-30 mile radius makes sense as a starting point, but if you have specific service zones, use zip codes. Don’t target areas you genuinely can’t or won’t service. Every click from outside your zone is wasted money.
Layer in demographic targeting. Facebook lets you filter by homeownership status, household income, and age. For most contractor services, you want homeowners, not renters. Renters don’t book roofing jobs or kitchen remodels. Depending on your average job size, filtering for higher household income brackets can also improve lead quality, though this narrows your audience so test it carefully. Age ranges typically vary by service: HVAC replacement tends to skew toward homeowners in their 40s and 50s, while first-time renovation projects often attract younger homeowners.
Use interest-based targeting strategically. Interests like home improvement, home renovation, kitchen remodeling, or roofing can help you reach people who are actively in the mindset of improving their homes. One counterintuitive tip: include DIY interests in your targeting. People who search for DIY tutorials often realize partway through that they need a professional. Reaching them at that moment of realization is valuable. The same targeting principles apply whether you’re running Facebook ads for roofing contractors or promoting general renovation services.
Lookalike Audiences are a powerful tool once you have data to work with. If you have a customer list of 100 or more past clients, upload it to Meta and create a 1-2% Lookalike Audience. Meta will find people who share characteristics with your best customers. You can also build Lookalikes from your website visitor data once the Pixel has accumulated enough traffic.
One critical pitfall to avoid: don’t start with an audience that’s too small. If your targeting gets so specific that your audience drops below 50,000 people, Facebook’s algorithm doesn’t have enough room to optimize. Aim for an audience size between 50,000 and 200,000 when you’re starting out. You can always tighten it later once you have performance data.
Step 3: Choose the Right Campaign Objective and Structure
Not all campaign objectives are created equal, and choosing the wrong one is a common reason contractor campaigns underperform. The objective you select tells Facebook what kind of results to optimize for. If you choose Traffic, Facebook will find people who click links. If you choose Engagement, it’ll find people who like posts. Neither of those pays your bills.
For contractors, use Lead Generation or Conversions. Lead Generation uses Facebook’s native lead forms, which open directly inside the app. Conversions send people to your landing page and optimize for form submissions or calls tracked by your Pixel. Both can work well, but they behave differently.
Facebook Lead Forms have lower friction because users don’t leave the platform. Their contact information is often pre-filled from their Facebook profile, which makes it easy to submit. The downside is that this same ease can attract lower-quality leads. People sometimes submit without fully intending to follow through. Landing page conversions tend to produce more qualified leads because the person had to actively leave Facebook, visit your site, and fill out a form. That extra step filters out casual clickers. Test both to see what works for your specific service and market.
Structure your campaigns by service. Don’t run one campaign trying to sell roofing, HVAC, and kitchen remodels all at once. Create a separate campaign for each service. Within each campaign, run 2-3 ad sets testing different audiences (for example, one interest-based, one demographic-only, one Lookalike). Within each ad set, run 2-3 different ad creatives. This structure gives you clean data so you can see exactly what’s working. If you’re also weighing whether to run search ads alongside social, our breakdown of Google Ads vs Facebook Ads effectiveness can help you allocate budget wisely.
Budget realistically. Starting at $20-50 per day per campaign gives Facebook enough data to learn without draining your budget before you have results. Avoid the temptation to start at $5/day. Facebook needs approximately 50 conversion events per week per ad set to exit the learning phase and optimize effectively. Too small a budget means you’ll stay in the learning phase indefinitely.
On the question of Advantage Campaign Budget (CBO) versus ad set-level budgets: CBO lets Facebook automatically distribute budget across your ad sets toward the best performers. It’s useful once you have a campaign running and have identified which ad sets show promise. When you’re testing fresh, manual ad set budgets give you more control over what gets spend.
Step 4: Create Ads That Stop the Scroll and Get Homeowners to Respond
You can have perfect targeting and flawless tracking, but if your ad doesn’t stop someone mid-scroll, none of it matters. This is where most contractor ads fail. Stock photos, generic copy, and weak calls to action blend into the noise. Here’s how to stand out.
Before-and-after photos are your most powerful weapon. A photo of a dilapidated roof next to a crisp new installation tells a story in an instant. A gutted kitchen followed by the finished remodel makes the homeowner imagine their own home transformed. These images work because they’re specific, real, and emotionally resonant. You don’t need a professional photographer. A clean iPhone photo taken in good light will outperform a polished stock image every time because it looks real.
Video ads outperform static images for engagement on Facebook, particularly short project walkthroughs and transformation reveals. A 15-30 second video showing the before, the work in progress, and the finished result gives homeowners a window into what it’s like to work with you. It also builds trust in a way that a single photo can’t. You don’t need production value. Steady hands, decent lighting, and a clear progression are enough.
Follow this ad copy formula. Lead with the homeowner’s problem or desire (“Your roof has taken a beating this winter”), state your offer and what makes you different (“We offer free inspections with no pressure and complete most jobs in a single day”), add social proof (“Over 500 projects completed, fully licensed and insured, 4.9 stars on Google”), and close with a direct call to action. Keep copy concise. Most people won’t read a wall of text, but a few punchy lines paired with a strong visual will convert. These same creative principles work across industries, from contractors to Facebook ads for services of all types.
Headlines and CTAs that consistently drive action for contractors include:
“Get Your Free Estimate”: Direct, low-friction, and sets the right expectation for the next step.
“See What Your Neighbors Are Building”: Taps into social proof and local relevance simultaneously.
“Book Your Spring Project Before Slots Fill Up”: Creates urgency without being manipulative, especially effective for seasonal services like exterior painting or roofing.
Include trust signals in your ad creative. Mention your license number, the fact that you’re insured, how many years you’ve been in business, and your Google review rating. Homeowners are making a significant financial decision and inviting strangers into their homes. Every signal of credibility reduces hesitation and improves conversion rates.
Step 5: Build a Landing Page That Converts Clicks Into Booked Estimates
Sending Facebook ad traffic to your homepage is one of the most common and costly mistakes contractors make. Your homepage is designed for general visitors exploring your business. Your ad traffic has a specific intent and a short attention span. They need a dedicated page built for one purpose: getting them to request an estimate.
Every service campaign needs its own landing page. If you’re running ads for kitchen remodeling, the page they land on should talk exclusively about kitchen remodeling. The headline should mirror the ad they just clicked. The photos should show kitchen projects. The form should ask about their kitchen. Continuity between ad and landing page dramatically improves conversion rates because there’s no disconnect or confusion. This principle holds true whether you’re a general contractor or running a niche campaign like Facebook ads for outdoor lighting installations.
Your landing page needs these elements:
A headline that matches the ad: If your ad says “Free Roof Inspection for Homeowners in [City],” your headline should say the same thing. Don’t make visitors re-orient themselves.
A project gallery: Show your best work, specific to the service being advertised. Real photos, not stock imagery.
Three to five testimonials: Short, specific quotes from past customers. Include the customer’s first name and neighborhood if possible. “John from Westfield” is more credible than an anonymous review.
A short, simple form: Name, phone number, and project type is often enough. Every additional field you add reduces the number of people who complete it. Resist the urge to ask for a full project description, budget range, and timeline all at once. Get the contact info first. Qualify them on the call.
A click-to-call button: The majority of Facebook traffic is mobile. Make it effortless for someone to tap a button and call you directly. Put this button near the top of the page, not buried at the bottom.
Mobile optimization isn’t optional. If your landing page loads slowly or the form is hard to fill out on a phone, you will lose leads. Test your page on your own phone before you launch any campaign. If the experience feels clunky, fix it before you spend money sending traffic there.
Urgency elements can also move the needle: a seasonal offer (“Spring exterior painting special — book by May 31”), a note about limited scheduling availability, or a mention of financing options. These aren’t tricks. They’re honest signals that help people make a decision now rather than putting it off indefinitely.
Step 6: Launch, Monitor, and Optimize for Lower Cost Per Lead
You’ve built the foundation. Now it’s time to launch and manage intelligently. The biggest mistake at this stage is either touching your campaign too soon or ignoring it entirely.
Respect the learning phase. When you launch a new campaign, Facebook’s algorithm needs time to figure out who responds to your ads. During this period, performance can look inconsistent. Resist the urge to make changes in the first 3-5 days. Pausing and restarting ad sets resets the learning phase, which costs you time and data. Let it run. Facebook typically needs around 50 conversion events per ad set before it exits the learning phase and starts optimizing efficiently.
Focus on these three metrics above all others:
Cost Per Lead (CPL): How much are you spending for each form submission or call? This is your primary efficiency metric. What’s acceptable varies by service. A roofing lead that could turn into a $15,000 job can support a much higher CPL than a Facebook ads for lawn care lead for a $200 service.
Click-Through Rate (CTR): This tells you how compelling your ad is. A low CTR means the creative or copy isn’t resonating with your audience. If your CTR is weak, test new images or headlines before adjusting your audience.
Lead-to-Appointment Rate: This metric lives outside of Facebook, but it’s critical. If you’re getting leads but few of them convert to booked estimates, the issue might be lead quality, follow-up speed, or your sales process. Track this number and work backward to diagnose problems.
A/B testing works best when you change one variable at a time. Test a new image while keeping the copy identical. Or test two different headlines while keeping the image the same. Running tests for at least 5-7 days before drawing conclusions gives the algorithm enough data to show meaningful differences. Don’t declare a winner after 48 hours.
Scaling what works: When an ad set is performing well, increase the budget by 20-30% every 3-4 days rather than doubling it overnight. Sudden large budget increases can disrupt the algorithm’s optimization patterns and tank performance. Steady, incremental scaling is more reliable.
When to cut an ad set: if it’s spent two to three times your target CPL without a single conversion, it’s not going to turn around. Kill it and redirect that budget to what’s working.
Step 7: Follow Up Fast and Close the Loop on Every Lead
This is the step that separates contractors who profit from Facebook ads from those who write them off as a waste of money. You can have perfect targeting, compelling creative, and a high-converting landing page. If your follow-up is slow, you’ll lose the leads you paid for.
Sales research consistently shows that leads contacted within minutes of submitting a form convert at dramatically higher rates than leads contacted hours later. The homeowner who just filled out your form is thinking about their project right now. They might be on their lunch break, or sitting in a waiting room, or browsing while the kids are in bed. That window is short. When you call within five minutes, you’re reaching them while the problem is top of mind. When you call six hours later, they’ve moved on.
Set up instant lead notifications. Configure email and SMS alerts so you or your team is notified the moment a lead comes in. Meta’s lead form settings allow you to connect to a CRM or notification system directly. For landing page leads, your form tool should have notification settings you can configure.
Connect to a CRM or at minimum a Google Sheet. Leads that sit in your Facebook Ads Manager inbox get missed. Use Zapier to automatically push new leads into a spreadsheet, a simple CRM like HubSpot or Jobber, or your email inbox. The goal is to make sure no lead falls through the cracks because someone forgot to check a dashboard. If your campaigns aren’t delivering the results you expect, our guide on Facebook ads not working for business can help you diagnose the issue.
Retargeting is your second chance at leads who didn’t convert. Create a custom audience of people who visited your landing page but didn’t submit a form. Serve them follow-up ads featuring testimonials, project photos, or a different offer. These are warm prospects who showed interest. A second or third touchpoint often converts people who weren’t quite ready the first time.
Track revenue, not just leads. Your Facebook Ads Manager will show you cost per lead. But the metric that actually matters is cost per booked job. Keep a simple record of which leads came from Facebook, which ones turned into estimates, and which estimates turned into signed contracts. This tells you your true return on ad spend and helps you make smarter decisions about where to put your budget.
Finally, know when to get help. If your campaigns are consistently generating leads but you’re spending hours each week managing bids, testing creatives, and interpreting data, that time has a cost. Many contractors reach a point where professional Facebook ads management for small business pays for itself through better performance and freed-up time.
Your Launch Checklist and Next Steps
You now have the complete playbook. Before you go live, run through this checklist to make sure nothing’s been missed.
1. Business Manager is set up with your Pixel installed, conversion events configured, and your domain verified.
2. Audiences are defined by location (your actual service area), homeowner status, and relevant interests or demographics.
3. Campaigns are structured with the right objective (Lead Generation or Conversions), realistic daily budgets, and separate campaigns per service.
4. Ads feature real project photos or video with copy that addresses the homeowner’s problem, states your differentiator, includes social proof, and ends with a clear CTA.
5. A dedicated landing page is live for each service with a short form, click-to-call button, testimonials, and mobile-optimized design.
6. You have a monitoring plan and know which metrics to track: CPL, CTR, and lead-to-appointment rate.
7. Lead follow-up is automated with instant notifications and a system to ensure every lead gets contacted within minutes.
The contractors who win with Facebook ads aren’t necessarily the ones with the biggest budgets. They’re the ones who build the system correctly and then optimize relentlessly based on real data. Every piece of this guide exists because it moves the needle on the thing that matters most: qualified homeowners calling you ready to book.
If you’d rather skip the learning curve and work with a team that has already managed millions in ad spend for contractors and home service businesses, Clicks Geek builds lead systems designed to turn ad dollars into booked jobs. If you want to see what this would look like for your business, we’ll walk you through how it works and break down what’s realistic in your market.