Most local business owners aren’t short on effort. They’re short on systems. You’re following up with leads manually, losing track of who called when, and watching your ad budget disappear while your competitor down the street somehow stays booked out three weeks in advance. The difference usually isn’t budget. It’s process.
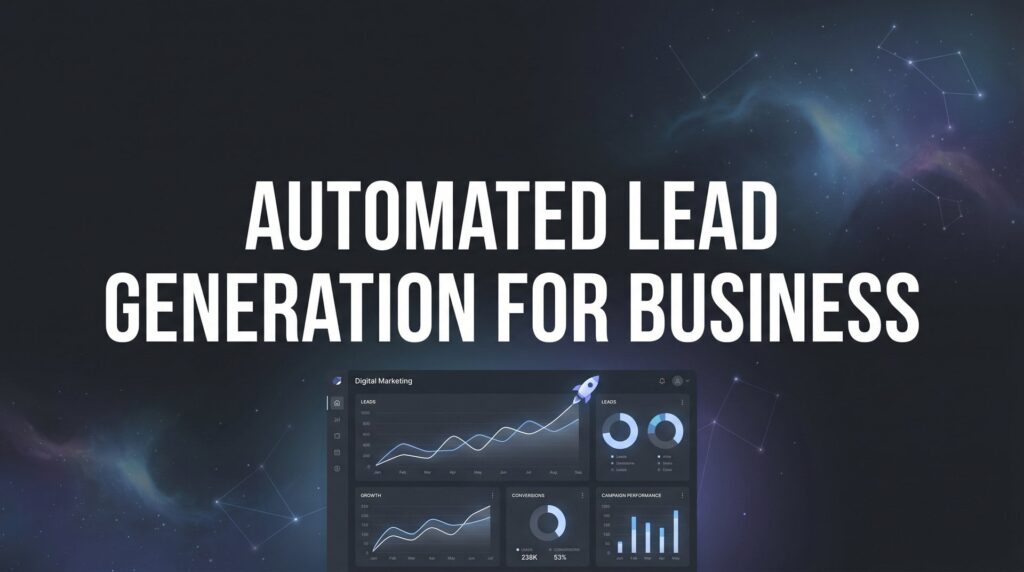
Automated lead generation for business is the process of building a connected system where paid traffic flows into a high-converting landing page, qualified leads get captured into your CRM, follow-up happens instantly without anyone lifting a finger, and every dollar spent is tracked back to actual revenue. When it works, your pipeline fills while you’re on a job site, in a meeting, or asleep.
Here’s the honest truth though: most businesses set this up backwards. They launch ads before building a landing page. They build a landing page before defining who they’re targeting. They set up a CRM before wiring up tracking. Then they wonder why nothing converts and blame the ad platform.
This guide fixes that. We’re going to walk through every step in the right order, from defining your ideal lead profile all the way to scaling what works and cutting what doesn’t. Each step builds on the last, so by the time you’re done, you’ll have a clear blueprint for a lead generation machine that runs around the clock.
Whether you run a plumbing company, a law firm, a dental practice, or any local service business, these steps apply. The tools may vary slightly, but the framework is the same. Let’s get into it.
Step 1: Define Your Ideal Lead Profile and Revenue Goals
Before you touch an ad platform or build a single landing page, you need to answer one question: what kind of lead is actually worth chasing? “More leads” is a terrible goal. It sounds right, but it leads to campaigns optimized for volume over quality, and suddenly your inbox is full of tire-kickers who want a free quote with no intention of buying.
Start by defining your ideal customer profile. Think about the service type they’re requesting, their location, their urgency level, and what they’re willing to spend. A plumber who wants emergency pipe repair jobs is targeting a completely different lead than one focused on bathroom remodels. These require different ads, different landing pages, and different follow-up sequences. Trying to automate for both without distinguishing between them creates a mess.
Write down the demographics, pain points, search intent, and buying triggers of your best customers. What did they search for? What problem were they trying to solve? What made them choose you over a competitor? This exercise takes maybe an hour, but it shapes every decision that follows.
Next, do the math. Know your numbers before you spend a dollar on automation. Work backwards from your revenue goal. If you close one in four qualified leads and your average job is worth a certain amount, you can calculate exactly how many leads you need per month and what you can afford to pay for each one. Understanding lead generation pricing gives your automated system real financial guardrails instead of just hoping the numbers work out.
Target Cost Per Lead: Divide your acceptable customer acquisition cost by your close rate. If you can spend a certain amount to acquire a customer and you close 25% of qualified leads, that’s your max cost per lead. Know this number before you set a single ad budget.
Target Cost Per Acquisition: This is the total spend required to land one paying customer, including ad spend, tool costs, and any agency fees. Track this from day one.
The common pitfall here is skipping this step entirely and jumping straight to running ads. When you don’t know your numbers, you have no way to tell if your automation is working or bleeding you dry. If you’re looking for proven approaches to attract the right prospects, these strategies to get more qualified leads can help you refine your targeting before you automate.
Success indicator: You can describe your ideal lead in one sentence and state exactly what you can afford to pay for them. If you can do that, you’re ready for Step 2.
Step 2: Build a High-Converting Landing Page That Does the Selling for You
Your homepage is not a landing page. This is one of the most common and costly mistakes in paid advertising. Homepages are built for exploration. Landing pages are built for one action. When you send paid traffic to your homepage, you’re giving visitors too many options, too many distractions, and no clear next step. Conversion rates suffer, your cost per lead climbs, and your automated lead generation system starts on shaky ground.
Every traffic source in your automated system needs a dedicated landing page built around a single, specific offer. If you’re running Google Ads for emergency HVAC repair, your landing page should be entirely about emergency HVAC repair, not your full service menu.
Here’s what a high-converting landing page needs:
A headline that matches search intent: If someone searched “emergency plumber near me,” your headline should speak directly to that. Message match between your ad and your landing page is critical. It reassures the visitor they’re in the right place and keeps them from bouncing immediately.
Trust signals above the fold: Reviews, star ratings, years in business, license numbers, and recognizable badges (Google Guaranteed, BBB accreditation) all reduce friction. People are handing you their phone number. Give them a reason to trust you before asking for it.
A single, clear CTA: One action. Either fill out the form or call the number. Don’t offer five different paths. Clarity converts.
Mobile-first design with fast load speed: A significant share of local service searches happen on mobile devices. If your page loads slowly or looks broken on a phone, you’re losing leads before they even read your headline. For a deeper dive into page performance, this guide on conversion optimization for lead generation websites covers the technical details that move the needle.
Smart form design: Collect enough information to qualify the lead without creating friction. Name, phone number, service needed, and zip code is often sufficient for a local service business. Adding one or two automated qualification questions, like “How soon do you need service?” or “What’s your estimated budget?”, helps filter out poor-fit leads before they ever reach your inbox.
For tools, Unbounce and Leadpages are solid options if you want to build and test pages without a developer. If you have technical resources, a custom-built page on your existing site gives you more flexibility. Choose based on your comfort level and how quickly you need to launch.
Success indicator: Your landing page is live, loads quickly on mobile, has a single CTA, and includes at least two trust signals. Benchmark your conversion rate once traffic starts flowing and compare it to typical ranges for your industry.
Step 3: Launch Targeted Ad Campaigns That Feed the Machine
Now you have a defined ideal customer and a landing page built to convert. It’s time to drive traffic. The traffic source you choose matters enormously, and the right answer depends on your business type and goals.
Google Ads for high-intent traffic: For most local service businesses, Google Search Ads are the highest-intent traffic source available. People searching “roof repair company near me” or “divorce attorney in [city]” are actively looking for a solution right now. They’re not scrolling passively. They have a problem and they want it solved. This makes PPC advertising services for small business the natural starting point for automated lead generation.
Meta/Facebook Ads for awareness and retargeting: Facebook and Instagram ads work differently. The audience isn’t actively searching, so you’re interrupting their scroll. This makes cold Meta traffic harder to convert for service businesses. Where Meta shines is retargeting, showing ads to people who already visited your landing page but didn’t fill out the form. These audiences already know you, and the cost to re-engage them is typically much lower than acquiring cold clicks.
When setting up Google Ads campaigns, get specific with your keyword targeting. Use phrase match and exact match keywords to control who sees your ads. Build a thorough negative keyword list from day one to prevent your budget from being burned on irrelevant searches. If you’re worried about overspending, this breakdown of why Google Ads feels too expensive for small business explains what’s really going on and how to fix it.
Ad-to-landing-page message match isn’t just a conversion best practice. It also affects your Google Ads Quality Score, which directly impacts how much you pay per click. The more relevant your ad is to your landing page, the better your score, and the lower your costs over time.
Budget allocation strategy: start focused. Pick your one or two highest-value service lines and run campaigns only for those. Resist the urge to advertise everything at once. Once you have data showing what’s converting, scale those campaigns and cut what isn’t working. Automation amplifies both good and bad campaigns, so get the fundamentals right before increasing spend.
Connect your ad platforms directly to your CRM. Both Google Ads and Meta have native integrations with most major CRM platforms. This means when someone fills out your landing page form, they flow directly into your CRM as a new lead, no manual CSV downloads, no data entry, no leads falling through the cracks at 11pm on a Saturday.
Success indicator: Your campaigns are live, conversion tracking is firing, and new leads are appearing in your CRM automatically within minutes of a form submission.
Step 4: Wire Up Your CRM and Automated Follow-Up Sequences
This is where the real automation happens. You can have the best ads and the highest-converting landing page in your market, but if leads sit untouched for hours, you’re losing business. Speed-to-lead is one of the most well-documented concepts in sales: the faster you respond to an inquiry, the dramatically higher your chances of making contact and converting that lead. Your competitors are often slow. Automation is how you win this race every single time, even at 2am.
Start by choosing your CRM. HubSpot offers a robust free tier that works well for small to mid-sized businesses. GoHighLevel has become popular with local service businesses because it combines CRM, automation, and appointment booking in one platform. Salesforce is powerful but often overkill for local businesses unless you have complex sales processes. The right choice depends on your budget, technical comfort level, and how many tools you want to manage. For a deeper look at how automation fits into your pipeline strategy, this guide on marketing automation for lead gen walks through the key workflows.
Once your CRM is connected to your landing page forms and ad platforms, build out your automated follow-up sequence. Here’s a structure that works for most local service businesses:
Immediate confirmation: The moment a lead submits a form, they should receive an automated text and email confirming receipt. Include your phone number, what to expect next, and a link to book an appointment if you have online scheduling. This happens in seconds, not hours.
Automated call task: Trigger a task in your CRM assigning a team member to call the lead within a defined window. Your automation handles the notification. Your team handles the human conversation.
Drip email nurture sequence: Not every lead is ready to buy immediately. Some are comparing options. Some have a problem that isn’t urgent yet. A short drip sequence of three to five emails over the following week or two keeps you top of mind without requiring any manual effort. Share relevant information, answer common questions, and include a clear call to action in each message.
Lead scoring: Assign point values to actions. A form fill is worth more points than a page visit. An email open is worth more than a click. A reply to your follow-up text is worth the most. Lead scoring surfaces your hottest prospects so your team focuses their time where it counts, not chasing cold leads who opened one email six days ago.
Automated appointment booking: Tools like Calendly, or the built-in scheduling features in GoHighLevel and HubSpot, allow qualified leads to book directly into your calendar without phone tag. Include the booking link in your confirmation message and your follow-up sequence. Many leads will self-schedule, which saves your team significant time.
Success indicator: Every new lead receives an automated response within minutes. Your team gets a call task immediately. No lead sits untouched for more than 24 hours, and your CRM shows a clear pipeline of where every prospect stands.
Step 5: Implement End-to-End Tracking and Attribution
You’ve built the machine. Now you need to be able to see inside it. Tracking is the backbone of automated lead generation for business. Without it, you’re making optimization decisions based on gut feelings instead of data, and that’s how budgets get wasted.
Start with the basics. Install Google Analytics 4 on your landing pages and website. Set up Google Tag Manager as your tag management system so you can deploy and manage tracking scripts without touching your site’s code every time. Connect Google Ads to your Google Analytics 4 property so campaign data flows into your analytics dashboard.
Set up conversion tracking on every ad platform you’re running. In Google Ads, this means creating conversion actions for form submissions and phone calls. In Meta, this means installing the Meta Pixel and configuring standard events. These conversion signals are what the ad platforms use to optimize your campaigns. Without them, you’re paying for clicks with no feedback loop telling the algorithm what a good result looks like. If you’re running Facebook campaigns alongside search, learning how to optimize Facebook Ads for leads ensures your Meta Pixel is configured correctly from the start.
Call tracking is non-negotiable for local businesses: Many local service leads happen over the phone, not through form fills. If you’re only tracking form submissions, you’re missing a significant portion of your actual lead volume. Set up dynamic number insertion using a tool like CallRail or CallTrackingMetrics. This technology swaps your phone number dynamically based on the traffic source, so a call from a Google Ads visitor gets attributed to the exact campaign and keyword that drove it. A call from organic search gets attributed differently. You can finally see which campaigns are actually generating phone calls, not just clicks.
Connect the full funnel. Your goal is to trace the path from ad click to landing page to form fill or phone call, into your CRM, through your follow-up sequence, and all the way to a closed deal. Most CRM platforms allow you to tag leads with their original source. When you close a job, you should be able to look at that customer’s record and see exactly which campaign, keyword, or ad brought them in. This is true ROI visibility, and it’s one of the biggest digital marketing challenges for small business owners to get right.
The most common tracking gap in local business marketing is offline conversions. Businesses track form fills and sometimes calls, but miss chat leads, walk-ins, and referrals that came from someone who saw an ad. Do your best to capture every conversion point, even if it requires a simple intake question like “How did you hear about us?”
Success indicator: You can open your reporting dashboard and tell exactly which campaign, keyword, or ad generated each paying customer this month. If you can’t answer that question, your tracking needs work.
Step 6: Optimize, Scale, and Cut What Doesn’t Convert
Building the system is the foundation. Making it profitable over time is the real work. This step is where most businesses either pull ahead of their competitors or plateau. The difference is consistency in reviewing data and making clear decisions based on what it tells you.
Establish a weekly optimization routine. Every week, review your cost per lead, cost per acquisition, lead quality scores from your CRM, and follow-up response times. These four numbers tell you most of what you need to know about system health. If cost per lead is creeping up, you likely have a keyword or audience issue. If lead quality is dropping, check your form qualification questions and your ad targeting. If response times are lagging, your internal process needs attention.
A/B test your landing pages: Never assume your first version is your best version. Test one element at a time: your headline, your CTA button text, your form length, or your trust signals. Even modest improvements in conversion rate compound meaningfully over time when you’re driving consistent paid traffic. Most landing page tools have built-in A/B testing functionality, so there’s no technical barrier to doing this.
Scale what works: When a campaign is generating qualified leads at or below your target cost per acquisition, that’s a signal to increase budget, expand to related keywords, or test similar audiences. For a complete framework on growing volume without sacrificing efficiency, this guide on how to scale lead generation lays out the step-by-step process.
Prune what doesn’t: Pause keywords that generate clicks but no conversions. Cut geographic areas where leads are expensive and rarely close. Remove audiences that produce high click-through rates but low-quality leads. Tightening your targeting is often more impactful than increasing your budget.
Adding new channels: Once your core paid search system is profitable and running smoothly, you can layer in additional channels. Retargeting campaigns on Meta and Google Display are typically cost-effective because you’re targeting people who already visited your site. Building a multi-channel marketing strategy for your local business reduces your dependence on any single paid source over time. Referral automation, asking happy customers to refer friends through a structured follow-up sequence, adds a high-quality, low-cost lead source on top of your paid system.
The goal is a system where your cost per qualified lead decreases over time while volume and quality both increase. That happens through consistent, data-driven optimization, not through set-it-and-forget-it thinking.
Success indicator: Three months in, your cost per acquisition is lower than it was at launch, your lead quality scores are trending up, and you have a clear picture of which channels are driving the most profitable customers.
Your Automated Lead Generation Checklist
Here’s a quick-reference summary of everything you need to build a complete automated lead generation system for your business:
Step 1: Define Your Ideal Lead Profile — Know exactly who you’re targeting, what they need, and what you can afford to pay to acquire them. Calculate your target cost per lead and cost per acquisition before spending anything.
Step 2: Build Dedicated Landing Pages — Create focused, single-CTA landing pages for each service or offer. Ensure message match with your ads, include trust signals, optimize for mobile, and add qualification questions to your form.
Step 3: Launch Targeted Ad Campaigns — Start with Google Ads for high-intent search traffic. Use tight keyword targeting, geographic targeting, and negative keywords. Connect your ad platforms directly to your CRM for automatic lead capture.
Step 4: Set Up CRM and Follow-Up Automation — Every lead should receive an automated response within minutes. Build a follow-up sequence that includes immediate confirmation, a team call task, a nurture drip, lead scoring, and self-service appointment booking.
Step 5: Implement Full-Funnel Tracking — Install GA4, Google Tag Manager, and conversion tracking on all platforms. Set up call tracking with dynamic number insertion. Connect your CRM to your ad platforms so you can trace every customer back to their original source.
Step 6: Optimize and Scale Consistently — Review your numbers weekly. A/B test landing pages. Scale winning campaigns. Cut underperformers. Add new channels only after your core system is profitable.
Automated lead generation for business is not a magic button you press once. It’s a system that requires careful setup, the right connections between tools, and ongoing attention to the data. The businesses winning right now aren’t necessarily spending more. They’re spending smarter, with systems that work around the clock while their competitors are still manually following up with leads from three days ago.
The good news is that once this system is built and dialed in, it compounds. Every optimization makes the next month better than the last. Every dollar you spend teaches the system what converts and what doesn’t.
If building and managing this system feels overwhelming, or if you’d rather have a team of specialists do it right the first time, Clicks Geek specializes in building automated lead generation machines for local businesses. From Google Ads campaigns to landing page conversion optimization to full-funnel attribution tracking, we’ve done this across dozens of industries as a Google Premier Partner agency. If you want to see what this would look like for your specific business, we’ll walk you through exactly how it works and what’s realistic in your market.