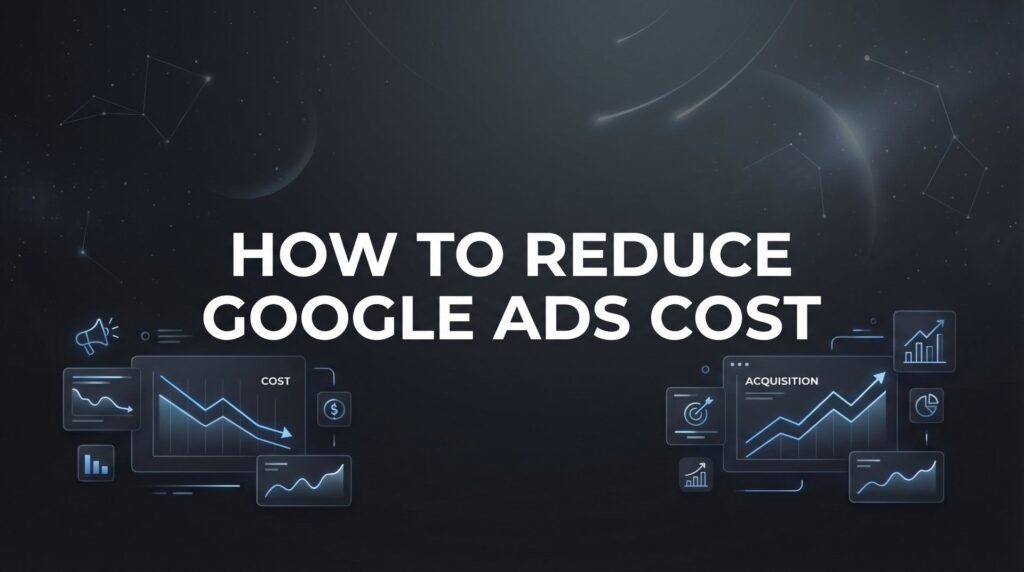
You’re watching your Google Ads budget drain faster than a bathtub with no stopper—and the leads trickling in don’t justify the spend. Sound familiar? You’re not alone. Most local business owners we talk to are paying far more per click than they need to, often because their campaigns are running on autopilot with outdated settings.
Here’s the reality: reducing your Google Ads cost isn’t about cutting corners or slashing your budget until your campaigns flatline. It’s about strategic optimization that makes every dollar work harder.
The businesses seeing the best ROI aren’t necessarily spending more—they’re spending smarter. They’ve figured out that Google Ads rewards quality and relevance, not just the deepest pockets. When you optimize the right levers, you can actually lower your costs while improving your results—it’s not a trade-off, it’s a multiplier effect.
In this step-by-step guide, you’ll learn exactly how to reduce your Google Ads cost while maintaining (or even improving) your lead quality. We’ll cover everything from Quality Score optimization to bid strategy adjustments, negative keyword management, and audience refinement. Each step builds on the last, giving you a systematic approach to campaign efficiency.
By the time you finish implementing these seven steps, you’ll have a leaner, meaner Google Ads account that delivers more qualified leads for less money. Let’s stop the budget bleed and start seeing real returns.
Step 1: Audit Your Quality Score and Fix the Gaps
Quality Score is Google’s report card for your ads, and it directly determines how much you pay per click. Think of it as Google’s way of saying, “How relevant and useful is your ad to the person searching?” The better your score, the less you pay for the same ad position.
Start by checking the Quality Score for every keyword in your account. Navigate to your keywords tab and add the Quality Score column if you haven’t already. You’re looking for anything below 7 on your high-volume terms—those are your problem children eating your budget.
Quality Score breaks down into three components: expected click-through rate, ad relevance, and landing page experience. Each one gets rated as below average, average, or above average. Your job is to identify which component is dragging each keyword down and fix it systematically. For a deeper dive into this process, check out our guide on improving Quality Score in Google Ads.
If expected CTR is the culprit, your ad copy isn’t compelling enough to stand out. Rewrite your headlines to include the exact keyword phrase and add a clear benefit or differentiator. Test different calls-to-action until you find what resonates with your audience.
When ad relevance scores low, you’ve got a mismatch between your keyword and your ad copy. This typically happens when ad groups are too broad, mixing unrelated keywords together. Create tighter ad groups with 10-15 closely related keywords maximum—the tighter the theme, the easier it is to write perfectly relevant ads.
Landing page experience issues mean your destination page doesn’t deliver what the ad promises, loads too slowly, or provides a poor mobile experience. We’ll dig deeper into landing page optimization in Step 6, but for now, ensure your headline matches your ad copy and your page loads in under three seconds.
Here’s a powerful tactic most advertisers miss: use dynamic keyword insertion strategically in your headlines. When done right, it makes your ad hyper-relevant to each search query without creating hundreds of individual ads. Just make sure your default text makes sense if the keyword doesn’t fit.
Success indicator: You should see Quality Score improvements of 2+ points within 2-4 weeks of implementing these changes. As scores climb, watch your average CPC drop—sometimes dramatically. A jump from Quality Score 5 to 8 can cut your costs by 30% or more for the same ad position.
Step 2: Build a Negative Keyword Fortress
Negative keywords are your defense against wasted spend, yet they’re criminally underutilized in most accounts. Every dollar spent on an irrelevant click is a dollar that can’t go toward someone actually ready to buy from you.
Pull your Search Terms Report for the last 90 days. This shows you the actual phrases people typed before clicking your ads. You’ll likely be shocked by what you find—job seekers looking for employment at your company, DIY enthusiasts wanting free information, people searching for your competitors, and bargain hunters looking for the cheapest possible option.
Start identifying patterns in irrelevant searches. Common culprits include terms with “jobs,” “careers,” “hiring,” “free,” “DIY,” “how to,” competitor brand names, wrong service areas, and review-related searches that never convert. Each of these represents budget leaking out of your account. Our detailed walkthrough on creating negative keyword lists can help you build comprehensive exclusions.
Create themed negative keyword lists to organize your exclusions. Build separate lists for competitor terms, job seekers, information seekers, wrong locations, and price shoppers. This makes it easier to apply the right exclusions to the right campaigns without accidentally blocking legitimate traffic.
Add negative keywords at both the campaign level and the account level. Campaign-level negatives give you precision control, while account-level lists provide blanket protection across everything. For universal exclusions like “jobs” or “free,” use account-level lists to save time.
Don’t just add exact match negative keywords—use phrase match and broad match modifiers to cast a wider net. If you’re excluding “free,” you want to block “free consultation,” “free quote,” “free estimate,” and every other variation without adding them individually.
Review your search terms weekly for the first month, then shift to monthly reviews once your negative keyword lists mature. New irrelevant searches will always pop up as Google’s algorithms expand your reach, so ongoing maintenance is critical.
Success indicator: You should see irrelevant clicks drop by 20-40% within the first month. Your click-through rate will likely improve since you’re eliminating low-intent impressions, and your conversion rate should climb as more budget flows toward qualified prospects.
Step 3: Restructure Match Types for Precision Targeting
Match types determine how closely a search query needs to match your keyword before your ad shows. Most accounts lean too heavily on broad match, which gives Google maximum freedom to interpret your intent—and maximum opportunity to waste your money on tangentially related searches.
Start by auditing your current match type distribution. Look at where your budget is actually going, not just how many keywords you have in each category. You’ll probably find that broad match keywords are consuming the lion’s share of your spend with mediocre conversion rates.
Shift budget toward phrase and exact match for your proven converting terms. These match types give you predictability and control. If you know “emergency plumber Chicago” converts at a profitable rate, lock it down with exact match so you’re not paying for “plumber jobs Chicago” or “Chicago plumbing history.” For more details on this strategy, see our keyword match types tutorial.
That doesn’t mean broad match is always bad—it can be valuable for discovery when paired with smart bidding and robust negative keyword lists. But treat it as a research tool, not your primary targeting method. Let broad match find new opportunities, then graduate winning keywords to phrase or exact match.
Consider creating single keyword ad groups (SKAGs) for your top 5-10 converting keywords. This gives you maximum control over bids, ad copy, and landing pages for your most valuable traffic. Yes, it’s more work to manage, but the ROI improvement on your best keywords justifies the effort.
Here’s the hierarchy that works for most local businesses: exact match for proven winners with high volume, phrase match for strong performers with moderate volume, and limited broad match with close monitoring for discovery. This structure balances control with opportunity.
Watch what happens to your metrics after restructuring. You’ll likely see conversion rates climb because you’re showing ads to more precisely targeted searchers. Cost per conversion typically drops because you’re eliminating the fuzzy edges where broad match wanders into irrelevant territory.
Success indicator: Higher conversion rates and lower cost-per-conversion within 30 days, even if your overall click volume decreases slightly. Remember, you’re optimizing for profitable results, not maximum traffic.
Step 4: Optimize Your Bid Strategy for Your Goals
Your bid strategy tells Google what you’re trying to accomplish, but many accounts are stuck on “Maximize Clicks”—which just means Google will get you as many clicks as possible regardless of whether they convert. That’s like telling a salesperson their only goal is to talk to people, not actually close deals.
Evaluate your current bid strategy against your actual business objectives. If you’re trying to generate leads at a specific cost, why are you optimizing for clicks? If you’re trying to drive revenue, why aren’t you using a revenue-focused strategy? Understanding how to reduce cost per lead starts with aligning your bidding to your actual goals.
Once you have at least 30 conversions per month in a campaign, switch to Target CPA or Target ROAS. These smart bidding strategies use Google’s machine learning to automatically adjust bids based on conversion likelihood. They’re not perfect, but they’re significantly better than manual bidding for most advertisers.
Set your target CPA based on historical data, not wishful thinking. Look at what you’ve actually been paying per conversion over the last 60-90 days, then set your target slightly lower—maybe 10-15% below your current average. This gives the algorithm room to optimize without setting an impossible goal that causes it to stop spending.
Don’t panic if performance dips slightly in the first week or two after switching bid strategies. Smart bidding needs a learning period to gather data and optimize. Give it at least two full weeks before making major adjustments, and avoid changing your target CPA more than once every 7-10 days.
Layer in bid adjustments for devices, locations, and time of day based on your performance data. If mobile converts at half the rate of desktop, reduce your mobile bids by 30-40%. If leads from downtown convert better than suburbs, increase bids for your core service area.
Time-of-day bid adjustments can be powerful for local businesses. If you get most calls during business hours, why pay the same for clicks at 2 AM? Reduce overnight bids by 50-70% to save budget for high-intent daytime traffic.
Success indicator: Cost per conversion decreases while conversion volume stays stable or grows. If volume drops significantly, your target may be too aggressive—raise it slightly and monitor for another two weeks.
Step 5: Tighten Geographic and Schedule Targeting
Location targeting seems straightforward until you dig into the data and realize you’re paying for clicks from areas you don’t even serve, or from locations that never convert despite decent traffic volume.
Pull your location report for the last 90 days. Sort by cost to find where your budget is actually going, then cross-reference with conversions. You’ll often discover expensive locations that haven’t produced a single lead—that’s pure waste.
Exclude locations with high spend and zero conversions. Be aggressive here. If you’ve spent $200+ in a zip code with nothing to show for it, that area either doesn’t need your service or your ads aren’t resonating there. Either way, stop the bleeding and redirect that budget to proven areas. This is a core principle covered in our Google Ads optimization guide.
For service-area businesses, verify that your targeting matches where you actually operate. We’ve seen accounts targeting entire states when they only serve a 20-mile radius. Tighter geographic targeting means more relevant traffic and lower wasted spend on people outside your service area.
Now analyze your day-of-week and hour-of-day performance data. Navigate to the ad schedule report and look for patterns. Many businesses find that weekends convert poorly, or that late-night clicks rarely turn into customers.
You have two options for underperforming time windows: reduce bids or pause ads entirely. If a time slot shows some promise but just converts at a higher cost, reduce bids by 30-50%. If it consistently produces zero results, pause it completely and reallocate that budget to your best-performing hours.
Consider your business operations when setting schedules. If you’re a local service business that doesn’t answer phones after 6 PM, why run ads at full strength until midnight? Scale back evening hours unless you have strong evidence that late-night clicks convert the next day.
Success indicator: Same or better results from a smaller, more focused targeting footprint. Your impressions may drop, but your conversion rate should improve as you concentrate spend on your best-performing geographic areas and time windows.
Step 6: Improve Landing Page Performance to Lower CPC
Your landing page directly impacts your Quality Score, which directly impacts your cost per click. Google wants to send searchers to pages that deliver a good experience, and they’ll charge you more if your page disappoints visitors.
Start with page speed—it’s the foundation of everything else. Use Google PageSpeed Insights to test your landing page load time. Every second of delay increases bounce rate and signals to Google that your page provides a poor experience. Mobile pages should load in under three seconds; desktop in under two.
Common speed killers include oversized images, excessive scripts, unoptimized code, and slow hosting. Compress your images, minimize JavaScript, enable browser caching, and consider upgrading your hosting if you’re on a budget shared server. These technical fixes often yield immediate Quality Score improvements.
Message match is critical but frequently overlooked. If your ad promises “same-day plumbing repair,” your landing page headline better say “same-day plumbing repair”—not “professional plumbing services.” When visitors see the exact phrase they clicked on, they immediately know they’re in the right place. Learn more about this in our resource on choosing the right landing page for your ads.
Add trust signals near your call-to-action. Customer reviews, industry certifications, guarantees, and security badges all reduce friction and increase conversions. People are more likely to submit their information when they see evidence that others have had positive experiences with your business.
Simplify your forms ruthlessly. Every field you require reduces your conversion rate. Do you really need their company name, job title, and phone number? For most local businesses, name, email, and phone number are sufficient. You can gather additional details later in the sales process.
Make your call-to-action prominent and specific. “Submit” is weak. “Get Your Free Quote” or “Schedule Your Consultation” tells visitors exactly what happens next. Use contrasting colors to make the button stand out, and repeat it at multiple points on the page for longer content.
Test mobile experience separately—over half your traffic likely comes from mobile devices. Ensure buttons are finger-friendly, forms work smoothly on small screens, and your page doesn’t require zooming or horizontal scrolling. Google explicitly factors mobile experience into Quality Score.
Success indicator: Landing page experience score improves from “average” to “above average” in your Quality Score breakdown. As this happens, you’ll see Quality Scores rise across related keywords, and your average CPC should drop accordingly.
Step 7: Implement Audience Layering and Exclusions
Audience targeting lets you adjust bids based on what Google knows about the person searching, not just the keywords they typed. This adds a powerful dimension to your targeting that most local businesses completely ignore.
Start by adding observation audiences to your campaigns. These don’t restrict who sees your ads—they just let you see how different audience segments perform. Add in-market audiences related to your service, affinity audiences that match your customer profile, and detailed demographics.
After two weeks of data collection, analyze which audiences convert at higher rates. You’ll often discover that certain demographic groups or in-market segments significantly outperform your baseline. These insights let you bid more aggressively on high-value audiences while maintaining overall efficiency. This approach directly supports your efforts to reduce customer acquisition cost across your campaigns.
Create remarketing lists for people who’ve visited your website but haven’t converted yet. These warm audiences already know your brand and are more likely to convert than cold traffic. Set bid adjustments of 50-100% higher for remarketing audiences—they’re worth more because they’re further down the funnel.
Here’s a critical exclusion most advertisers miss: past converters. If someone already submitted a lead form or called you, why keep showing them lead generation ads? Create a conversion-based audience and exclude it from your campaigns. This prevents wasted spend on people who’ve already taken action.
Layer in-market audiences to refine your targeting. If you’re a roofing contractor, layer the “home improvement” in-market audience with an increased bid adjustment. These are people Google has identified as actively researching home improvement services—exactly who you want to reach.
Consider life event targeting for services tied to major transitions. Moving, getting married, having a baby, graduating—these events create demand for specific services. If your business serves people going through these transitions, layer the appropriate life event audiences with higher bids.
Don’t set audience bid adjustments too aggressively at first. Start with 20-30% increases for promising audiences and monitor performance for at least two weeks before adjusting further. Small incremental changes prevent you from accidentally blowing your budget on an audience that looked good in limited data.
Success indicator: Higher conversion rates from audience-targeted traffic at lower overall cost. You’re essentially cherry-picking the most qualified segments within your keyword targeting, which drives efficiency across your entire account.
Putting It All Together
You now have a complete roadmap to reduce your Google Ads cost without gutting your results. Let’s break down your implementation plan so you can start seeing improvements immediately.
Quick implementation checklist: audit and improve Quality Scores, build comprehensive negative keyword lists, restructure match types for precision, optimize your bid strategy, tighten geographic and schedule targeting, improve landing page performance, and layer audiences strategically.
Don’t try to tackle everything at once—that’s a recipe for overwhelm and mistakes. Start with Steps 1 and 2 this week. Quality Score improvements and negative keyword additions deliver quick wins with minimal risk. You’ll see results within days as irrelevant clicks disappear and your relevance scores climb.
Next week, move to Steps 3 and 4. Restructuring match types and optimizing your bid strategy requires more careful planning, but the impact on your cost per conversion can be dramatic. Give these changes two weeks to stabilize before moving forward.
In weeks three and four, implement Steps 5, 6, and 7. Geographic targeting refinements, landing page improvements, and audience layering add the final polish to your optimization efforts. By the end of month one, you’ll have transformed your account from a budget-draining liability into an efficient lead generation machine.
The businesses that consistently win with Google Ads aren’t the ones with the biggest budgets. They’re the ones who obsess over efficiency and refuse to let a single dollar go to waste. They understand that optimization is ongoing, not a one-time project.
Set a recurring calendar reminder to review your search terms every two weeks, check Quality Scores monthly, and analyze performance by location, device, and time of day quarterly. This consistent maintenance prevents your account from sliding back into inefficiency.
Remember, reducing your Google Ads cost isn’t about spending less—it’s about spending smarter. When you implement these seven steps systematically, you’ll find that your budget goes further, your leads are higher quality, and your ROI improves dramatically.
Tired of spending money on marketing that doesn’t produce real revenue? We build lead systems that turn traffic into qualified leads and measurable sales growth. If you want to see what this would look like for your business, we’ll walk you through how it works and break down what’s realistic in your market. Clicks Geek specializes in turning bloated Google Ads accounts into lean, conversion-driving machines for local businesses.
Want More Leads for Your Business?
Most agencies chase clicks, impressions, and “traffic.” Clicks Geek builds lead systems. We uncover where prospects are dropping off, where your budget is being wasted, and which channels will actually produce ROI for your business, then we build and manage the strategy for you.