You’re spending money on paid advertising, but do you actually know what you’re getting back? For local business owners, this question keeps them up at night—and rightfully so. Every dollar spent on Google Ads, Facebook campaigns, or any other paid channel should be working hard to bring in customers and revenue.
The problem is that most businesses either don’t track their advertising ROI at all, or they’re tracking the wrong metrics entirely. They celebrate clicks and impressions while their bank account tells a different story. A campaign might generate thousands of clicks, but if those clicks aren’t turning into paying customers, you’re just burning money.
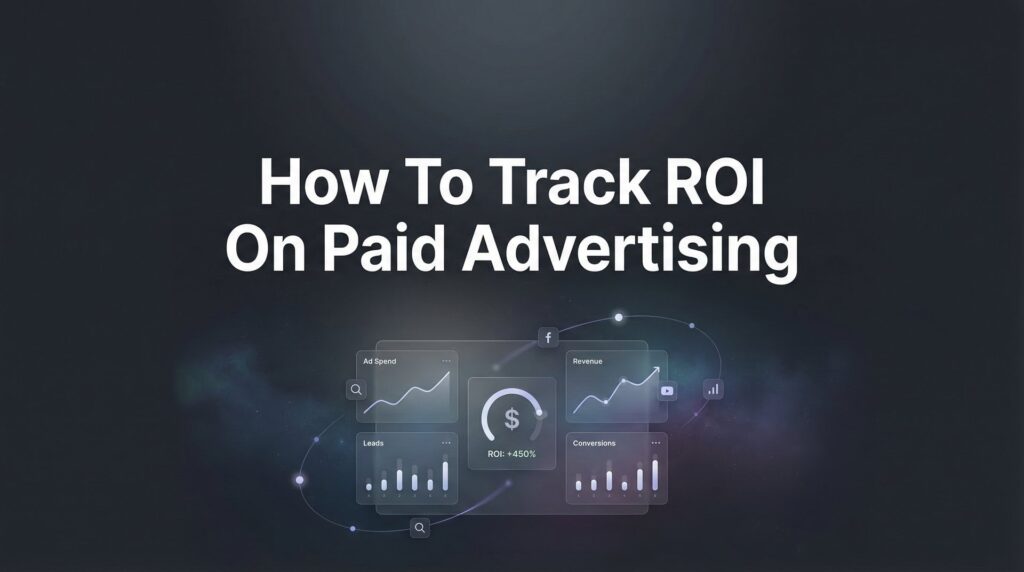
This guide cuts through the confusion and shows you exactly how to track ROI on paid advertising—the real numbers that matter for your bottom line. You’ll learn how to set up proper tracking infrastructure, connect your ad spend to actual revenue, and make data-driven decisions that improve your results over time.
Whether you’re running campaigns yourself or working with an agency, understanding these fundamentals puts you in control of your marketing investment. No more guessing. No more hoping your ads are working. Just clear data that tells you exactly what’s delivering results and what’s wasting your budget.
Step 1: Define Your Revenue Goals and Customer Value Metrics
Before you can track ROI, you need to know what a customer is actually worth to your business. This isn’t about vanity metrics or platform numbers—it’s about cold, hard revenue reality.
Start by calculating your average customer lifetime value (CLV). This is the total revenue you expect from a customer over their entire relationship with your business. For a one-time purchase business like a roofer, this might be the average project value. For a recurring service like a lawn care company, it’s the monthly fee multiplied by how many months the average customer stays.
Let’s say you run a dental practice. Your average patient spends $800 on their first visit, then returns twice a year for cleanings at $200 each. Over five years, that’s $2,800 in revenue from one patient. That’s your CLV—and it tells you how much you can afford to spend acquiring that patient.
Next, determine your target cost per acquisition (CPA) based on your profit margins. If your profit margin is 40% on that $2,800 lifetime value, you’re making $1,120 per patient. You might decide you’re comfortable spending up to $400 to acquire a new patient, giving you a 180% ROI over their lifetime. Understanding how to reduce customer acquisition cost becomes critical once you’ve established these baseline numbers.
Set specific revenue targets for your paid advertising campaigns. Don’t just say “I want more customers.” Say “I need to generate 15 new patients per month at a maximum CPA of $400 to hit my revenue goals.” This specificity forces you to track the metrics that actually matter.
Document these baseline numbers before launching any tracking. Write down your CLV, your target CPA, your profit margins, and your monthly revenue goals. These benchmarks become your measuring stick for every campaign decision you make.
Here’s the thing: most businesses skip this step entirely. They jump straight into running ads without knowing what success looks like. Then they wonder why they can’t tell if their advertising is working. You need these foundational numbers to make sense of all the data that comes later.
Create a simple document that captures: average customer value, expected lifetime value, profit margin per customer, maximum acceptable CPA, and monthly new customer target. Keep it somewhere you’ll reference regularly—you’ll need these numbers for every ROI calculation moving forward.
Step 2: Install Conversion Tracking on Your Website
Now that you know what you’re measuring, it’s time to set up the infrastructure to actually capture that data. This is where most businesses either get overwhelmed or make critical mistakes that corrupt their data for months.
Start by setting up Google Tag Manager as your central tracking hub. Think of it as the command center that manages all your tracking codes without requiring you to edit your website code every time you add a new platform. You install Tag Manager once, then use it to deploy Google Ads tracking, Facebook Pixel, analytics tools, and anything else you need.
Once Tag Manager is in place, install Google Ads conversion tracking for every action that matters to your business. For most local businesses, this means phone calls, form submissions, and online purchases if you sell products. Each of these needs its own conversion action in Google Ads. If you’re struggling with this setup, our guide on fixing your marketing conversion tracking walks through the most common mistakes.
Phone call tracking is particularly critical for local businesses. Set up call conversion tracking that fires when someone clicks your phone number on mobile or when they call from a desktop ad extension. You can configure it to only count calls longer than a certain duration—say, 60 seconds—to filter out wrong numbers and spam.
Configure Facebook’s Meta Pixel for social advertising attribution. Even if you’re not running Facebook ads yet, install it now. The Pixel starts collecting data immediately, building an audience profile you can use later. It tracks page views, form submissions, and custom events you define.
Here’s where people mess up: they install tracking codes but never verify they’re working. Before you spend a single dollar on ads, test every conversion action. Fill out your own contact form. Call your own business number. Make a test purchase if applicable. Then check your Google Ads and Facebook dashboards to confirm those actions registered as conversions.
This testing phase catches configuration errors that would otherwise cost you money. Maybe your form submission isn’t firing the conversion tag. Maybe your call tracking is counting all calls instead of just the ones from ads. You need to know this before you start optimizing campaigns based on faulty data.
Set up conversion values wherever possible. If someone fills out a form requesting a quote, and you know that 30% of quote requests turn into customers worth $2,800, assign a conversion value of $840 to that form submission. This lets your ad platforms optimize for revenue, not just conversions.
Document what you’ve installed and how it’s configured. Write down which conversion actions you’re tracking, what counts as a conversion, and any filters you’ve applied. Six months from now when you’re reviewing your data, you’ll need to remember that you only count calls over 60 seconds or that form submissions have an assigned value of $840.
Step 3: Connect Your CRM and Lead Tracking Systems
Conversion tracking tells you when someone took an action on your website, but it doesn’t tell you if they became a paying customer. That’s where your CRM and lead tracking systems come in—they close the loop between ad clicks and actual revenue.
Link your CRM to capture lead source data from paid campaigns. Most modern CRMs like HubSpot, Salesforce, or even simpler tools like Pipedrive can accept UTM parameters and ad platform data. When a lead comes in, your CRM should automatically record which campaign, ad group, and specific ad generated that lead.
Set up call tracking for marketing campaigns with dynamic number insertion to attribute phone leads accurately. Services like CallRail or CallTrackingMetrics display different phone numbers to visitors based on their traffic source. Someone who clicks a Google Ad sees one number, while someone from Facebook sees another. When they call, the system knows exactly which campaign drove that call.
This is absolutely essential for local businesses where phone calls often represent the highest-value conversions. Without call tracking, you’re flying blind on a massive portion of your ROI. You might be spending heavily on campaigns that drive tons of phone calls, but you’d have no way to connect those calls back to specific ads or keywords.
Create UTM parameters for every campaign, ad group, and ad variation you run. UTM parameters are the tags you add to your destination URLs that tell analytics tools where traffic came from. They look like this: utm_source=google&utm_medium=cpc&utm_campaign=roofing_emergency&utm_content=ad_variant_a
Build a naming convention and stick to it religiously. Use consistent capitalization, avoid spaces, and create a system that makes sense at a glance. Six months from now when you’re looking at your data, “roofing_emergency_june2026” is much clearer than “test_campaign_2” or “new_ads_v3”.
Establish a process for your team to mark leads as qualified, closed, or lost in your CRM. This is where the revenue connection happens. When a lead converts to a customer, someone on your team needs to update their status and record the revenue amount. If you’re struggling with lead quality, understanding the low quality leads problem can help you diagnose what’s going wrong.
This process discipline is what separates businesses that actually track ROI from businesses that just think they do. Your ad platforms can tell you about clicks and conversions. Your CRM tells you about revenue. Connecting the two requires your team to consistently update lead statuses with accurate information.
Create a weekly reminder for whoever manages leads to review and update statuses. Make it part of your standard workflow. The more consistent your data entry, the more reliable your ROI calculations become.
Step 4: Build Your ROI Calculation Framework
You’ve got conversion tracking installed and your CRM is capturing lead outcomes. Now it’s time to build the framework that turns all that data into actionable ROI numbers.
Master the basic ROI formula: (Revenue – Ad Spend) / Ad Spend x 100. If you spent $1,000 on ads and generated $4,000 in revenue, your calculation is ($4,000 – $1,000) / $1,000 x 100 = 300% ROI. For every dollar you invested, you got three dollars back in profit. Our complete guide on how to track marketing ROI dives deeper into these calculations.
But here’s where it gets tricky: you need to account for the full customer journey. Some leads convert immediately, while others take weeks or months to make a buying decision. A home remodeling company might see leads from January ads that don’t convert until March when the customer is ready to start their project.
This is why you need to choose a consistent attribution window. Many businesses use a 30-day window—revenue from customers who first clicked an ad within the last 30 days gets attributed to that campaign. Others use 60 or 90 days depending on their typical sales cycle length.
Factor in your actual costs beyond just ad spend. If you’re paying an agency 20% management fees, that needs to be included in your cost calculation. If you’re using $200/month in software tools for tracking and CRM, add that in. Your true ROI includes everything you’re investing to run these campaigns.
Let’s say you spent $2,000 on Google Ads, paid $400 in agency fees, and spent $100 on software. Your total investment is $2,500. If those campaigns generated $8,000 in revenue, your ROI is ($8,000 – $2,500) / $2,500 x 100 = 220% ROI. Still excellent, but different from the 300% you’d calculate using ad spend alone.
Create a simple spreadsheet or dashboard template you’ll update regularly. Set up columns for: date range, campaign name, ad spend, agency/management fees, software costs, total investment, leads generated, customers acquired, revenue generated, and calculated ROI.
Add a row for each campaign you’re running, plus a summary row that shows your overall paid advertising performance. This gives you both the granular view (which specific campaigns are winning) and the big picture (is paid advertising profitable for your business overall).
Build in a section that tracks your target metrics from Step 1. Show your target CPA next to your actual CPA. Display your CLV assumption next to the actual average customer value from this month’s conversions. These comparisons reveal whether your assumptions were accurate or need adjustment.
Step 5: Set Up Attribution Modeling for Accurate Credit
Last-click attribution—giving all the credit to the final touchpoint before conversion—often undervalues your paid advertising significantly. A customer might see your Google Ad, visit your website, leave, see your Facebook retargeting ad, come back, leave again, then finally convert by typing your URL directly. Last-click gives all the credit to that direct visit, even though paid ads did the heavy lifting.
You need to choose an attribution model that matches your sales cycle length and customer journey complexity. For businesses with short sales cycles where people typically convert on first visit, last-click might be fine. For businesses where customers research extensively before buying, you need a model that gives credit to earlier touchpoints. Understanding what performance marketing is helps you grasp why attribution matters so much for ROI tracking.
Google Analytics 4 uses data-driven attribution by default, which can provide more accurate credit distribution than simple last-click models. Data-driven attribution uses machine learning to analyze all the touchpoints in successful conversion paths, then assigns credit based on which touchpoints actually influenced the decision.
If you’re running campaigns across multiple platforms—Google Ads, Facebook, maybe LinkedIn or display advertising—you need to understand that each platform will claim credit for conversions using its own attribution model. Google Ads might report 50 conversions while Facebook reports 35, and your actual number of new customers is 40. This overlap happens because attribution models give partial or full credit to multiple touchpoints.
The solution isn’t to pick one platform’s numbers as “truth.” Instead, use your CRM as the source of truth for actual customers and revenue, then use platform attribution data to understand which channels are contributing to the journey. Maybe Google Ads is great at generating awareness and initial interest, while Facebook retargeting excels at closing deals.
Document which attribution model you’re using so your data stays consistent over time. If you start with last-click attribution in January, switch to data-driven in March, then back to last-click in June, your year-over-year comparisons become meaningless. Pick a model, commit to it for at least six months, and only change it if you have a compelling reason.
Create a note in your ROI tracking spreadsheet that states your attribution model and window. Something like: “Using Google Analytics 4 data-driven attribution with 30-day window. Last updated March 2026.” This prevents confusion when you’re reviewing historical data or when someone else needs to understand your numbers.
Step 6: Create Your Weekly ROI Review Process
All the tracking infrastructure in the world means nothing if you’re not actually reviewing the data and making decisions based on what you find. This is where consistent process beats sporadic effort every single time.
Pull your ad spend and revenue data at the same time each week. Monday morning works well for many businesses—you’re reviewing the previous week’s performance and setting priorities for the week ahead. Choose a day and time that works for your schedule, then protect that time like you would any other important business meeting.
Calculate ROI by campaign, channel, and overall portfolio. Don’t just look at your total numbers—drill down into which specific campaigns are delivering results and which ones are burning budget. You might have an overall positive ROI while one campaign is crushing it and two others are losing money. If you’re seeing disappointing numbers, check out our strategies to fix low ROI from digital advertising.
Identify your top performers and underperformers for optimization. Your top performers might deserve increased budget or expansion into similar audiences. Your underperformers need investigation: is the targeting wrong, is the offer not compelling, is the landing page converting poorly, or should you just kill the campaign entirely?
Make one data-driven adjustment per week based on your findings. This might be pausing an underperforming ad group, increasing budget on a winning campaign, testing a new audience, or adjusting your bid strategy. The key is making changes based on actual performance data rather than hunches or what you think should work. Learning how to improve ads gives you a framework for these weekly optimizations.
Small, consistent optimizations compound over time. A business that makes one improvement per week based on real data will dramatically outperform a business that sets up campaigns and lets them run on autopilot. You’re not looking for home runs—you’re looking for steady improvement through data-driven decision making.
Track your week-over-week trends in a simple chart. Plot your total ad spend, total revenue, and ROI percentage over time. This visual representation helps you spot patterns: maybe ROI dips every third week of the month, or maybe certain campaigns perform better at different times of year.
Set up alerts for significant changes. If your cost per lead suddenly doubles or your conversion rate drops by 50%, you want to know immediately rather than discovering it in your weekly review. Most ad platforms let you set up automated rules that email you when metrics cross certain thresholds.
Your ROI Tracking Action Plan
Tracking ROI on paid advertising isn’t complicated once you have the right systems in place. Start with your customer value metrics, install proper conversion tracking, connect your CRM, build your calculation framework, set up attribution, and commit to weekly reviews.
The businesses that win with paid advertising aren’t necessarily the ones spending the most. They’re the ones who know exactly what they’re getting for every dollar invested. They can tell you which campaigns are profitable, which keywords drive the best customers, and which ad variations produce the highest ROI.
Use this checklist to get started today. First, define your CLV and target CPA—write down what a customer is worth and what you can afford to pay to acquire them. Second, install conversion tracking through Google Tag Manager for all your key actions. Third, set up call tracking and UTM parameters so you can attribute every lead back to its source.
Fourth, create your ROI spreadsheet with columns for all your costs and revenue by campaign. Fifth, choose your attribution model and document it so your data stays consistent. Sixth, schedule your weekly review session and actually show up for it every single week.
The setup takes some effort upfront, but it’s a one-time investment that pays dividends through better decision-making for months and years to come. You’ll stop wasting money on campaigns that don’t work. You’ll scale up the campaigns that do. And you’ll finally have real answers when someone asks whether your advertising is actually working.
If you want help implementing these systems or prefer to have experts manage your paid advertising with full ROI transparency, Clicks Geek specializes in helping local businesses get measurable results from their ad spend. We build lead systems that turn traffic into qualified leads and measurable sales growth. If you want to see what this would look like for your business, we’ll walk you through how it works and break down what’s realistic in your market.
Want More Leads for Your Business?
Most agencies chase clicks, impressions, and “traffic.” Clicks Geek builds lead systems. We uncover where prospects are dropping off, where your budget is being wasted, and which channels will actually produce ROI for your business, then we build and manage the strategy for you.