You’re spending money on ads, posting on social media, and maybe even getting website traffic—but the leads aren’t turning into paying customers. Sound familiar?
The problem isn’t your product or service. It’s that you’re missing a systematic way to guide potential customers from “just browsing” to “ready to buy.”
That system is called a sales funnel, and it’s the difference between businesses that struggle to grow and those that scale predictably. A sales funnel maps out every step of your customer’s journey: from the moment they discover you to the point they hand over their credit card (and beyond).
Without one, you’re essentially hoping people figure out how to buy from you on their own. With one, you’re strategically guiding them toward a purchase while building trust along the way.
In this guide, we’ll walk you through exactly how to build a sales funnel from scratch. No fluff, no theory, just actionable steps you can implement this week. Whether you’re a plumber trying to book more service calls, a lawyer looking to attract qualified clients, or any local business owner tired of unpredictable revenue, this framework works.
Let’s build a funnel that actually converts.
Step 1: Define Your Ideal Customer and Their Buying Journey
Here’s where most businesses go wrong: they try to serve everyone. The landscaper who takes any job regardless of size. The consultant who works with any industry. The restaurant that tries to please every dietary preference.
Your funnel can’t convert effectively if you’re speaking to everyone. Start by identifying your most profitable customer type—the ones who spend the most and cause the least headaches.
Look at your existing customer base. Who pays on time? Who refers others? Who values your expertise instead of shopping on price alone? These are your ideal customers, and your funnel should be built specifically for them.
Now map out their buying journey. What questions do they ask before hiring you? What concerns keep them from pulling the trigger? What finally convinces them to say yes? Understanding the customer acquisition funnel helps you identify exactly where prospects need more information or reassurance.
At the awareness stage, they’re just discovering they have a problem. A homeowner notices their HVAC system isn’t cooling properly. A business owner realizes their website looks outdated compared to competitors.
During consideration, they’re evaluating solutions. Should they repair or replace? Should they hire locally or use a national service? What’s a reasonable price range?
At the decision stage, they’re choosing between specific providers. Why should they pick you over the competition?
Document where your ideal customers currently find you. Are they searching Google when they need help urgently? Asking for referrals in local Facebook groups? Driving past your storefront?
Create a simple one-page customer avatar. Include basic demographics (age range, income level, location), their primary pain points, their goals, and the objections they typically have. This becomes your reference point for every piece of content you create.
When you know exactly who you’re talking to and what journey they’re on, every element of your funnel becomes clearer. Your messaging sharpens. Your offers become more relevant. Your conversion rates improve.
Step 2: Create a High-Value Lead Magnet That Solves a Specific Problem
Think about the last time you gave someone your email address. You didn’t do it because a business asked nicely. You did it because they offered something valuable enough to justify the exchange.
That’s your lead magnet: the irresistible offer that turns strangers into leads. But here’s the thing—most lead magnets fail because they try to do too much.
Your lead magnet should solve ONE immediate problem. Not educate someone on your entire industry. Not provide comprehensive training. Just solve one specific pain point that your ideal customer is experiencing right now.
For a roofing company, that might be a “Storm Damage Checklist: 12 Warning Signs Your Roof Needs Immediate Attention.” For a financial advisor, it could be a “Retirement Readiness Calculator” that shows whether someone is on track for their goals.
Choose a format that matches how your audience prefers to consume content. Busy executives might prefer a quick checklist they can skim in three minutes. Homeowners researching a major purchase might want a detailed PDF guide. Visual learners might respond better to a short video walkthrough.
The key is value density over length. A five-page guide that solves a real problem beats a 50-page ebook that nobody finishes reading.
Craft a title that promises a specific outcome. “The Ultimate Guide to Marketing” is vague and forgettable. “5 Facebook Ad Templates That Generated 247 Leads for Local Service Businesses” tells someone exactly what they’re getting and what result to expect.
Keep it consumable in under 10 minutes. Your lead magnet isn’t meant to be the entire solution—it’s meant to demonstrate your expertise and build trust. Save the comprehensive solutions for your paid services.
The best lead magnets also naturally lead to your core offer. If you’re a pest control company, a “DIY Pest Prevention Checklist” positions you as the expert while showing homeowners the complexity of keeping pests away year-round. When they realize they need professional help, you’re already top of mind. This approach is fundamental to understanding how to generate leads that actually convert.
Once you’ve created your lead magnet, test it with a few existing customers. Does it solve a problem they actually have? Would they have found it valuable before hiring you? Their feedback will tell you whether you’ve nailed it or need to refine your approach.
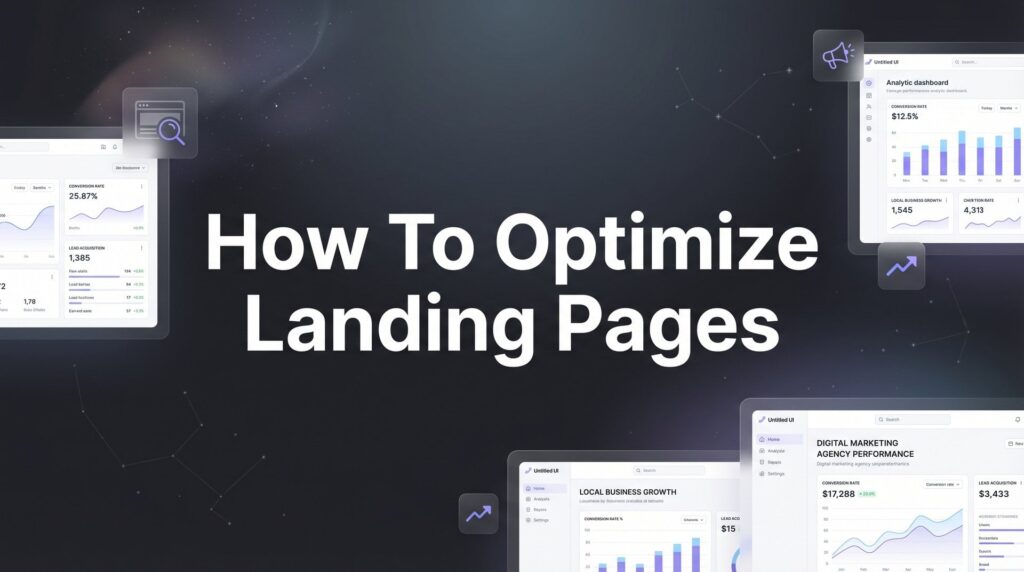
Step 3: Build a Landing Page That Captures Leads Effectively
Your landing page has one job: get people to download your lead magnet. That’s it. Not to showcase your full service menu. Not to tell your company’s entire history. Just to convert visitors into leads.
Start with a headline that clearly states the benefit of your lead magnet. “Download Our Free Guide” is weak. “Get the 7-Point Checklist That Helps Homeowners Avoid $15,000 Foundation Repair Bills” tells someone exactly why they should care.
Your landing page should include only essential elements. A compelling headline. Three to five bullet points explaining what they’ll get. A simple form. And trust indicators that prove you’re legitimate.
Remove your main navigation menu. Every link on your landing page is a potential exit point. You want visitors to make one decision: download the lead magnet or leave. Adding links to your services, about page, or blog gives them reasons to get distracted.
Keep your form short. For top-of-funnel lead magnets, asking for just a name and email is usually enough. You can gather more information later in your email sequence or when they’re ready to buy.
Every additional form field decreases conversion rates. Sure, you might want their phone number, company size, and budget range. But if asking for all that information cuts your conversion rate in half, you’re actually getting fewer qualified leads overall. Learning how to create high converting landing pages can dramatically improve your lead capture rates.
Add social proof elements strategically. If you have testimonials from happy customers, include one or two that specifically mention the problem your lead magnet addresses. If you’ve been featured in local media or have professional certifications, display those logos.
Review counts work well too. “Join 1,847 local business owners who’ve downloaded this guide” creates social proof without requiring detailed testimonials.
Make your call-to-action button stand out visually and use action-oriented copy. “Download My Free Checklist” performs better than a generic “Submit” button. The button should clearly state what happens when someone clicks it.
Test your landing page on mobile devices. Many of your visitors will find you through Facebook or Google ads on their phones. If your form is difficult to complete on mobile, you’re losing leads unnecessarily.
Step 4: Set Up an Email Nurture Sequence That Builds Trust
Someone just downloaded your lead magnet. Now what? This is where most businesses drop the ball. They either send nothing else or immediately hit new leads with a hard sales pitch.
Your email nurture sequence bridges the gap between “interested stranger” and “ready to buy.” Plan a sequence of five to seven emails that delivers value before asking for anything in return.
Email 1 arrives immediately: deliver the lead magnet and set expectations. “Thanks for downloading the checklist. Over the next week, I’ll send you a few emails with additional tips on [topic]. No spam, just useful information.”
Email 2 (day 2) expands on one key point from your lead magnet. If your checklist mentioned the importance of regular maintenance, this email could dive deeper into what that maintenance looks like and why it matters.
Email 3 (day 4) addresses a common objection or concern. For a home services business, this might tackle “How do I know if I really need professional help or if this is a DIY job?” Answer honestly and position yourself as a trusted advisor, not a pushy salesperson.
Email 4 (day 6) showcases your expertise through a case study or client result. “Last month, we helped a homeowner in [neighborhood] who was dealing with [problem]. Here’s what we did and the results they got.” Real stories from real clients build credibility in ways that generic marketing claims never will.
Email 5 (day 8) introduces your core offer softly. “Now that you understand [topic], you might be wondering how to implement this in your own situation. Here’s how we help clients with exactly that…”
Emails 6 and 7 (days 10 and 12) can address final objections and create gentle urgency. Maybe you mention limited availability, seasonal pricing, or the consequences of waiting too long to address the problem.
Structure each email to be scannable. Use short paragraphs. Include subheadings if the email is longer than a few hundred words. End with a single clear call-to-action. Don’t give people five different options—guide them toward one next step.
The key is providing genuine value in every email. If someone could read your entire sequence and walk away with useful information even if they never hire you, you’ve done it right. That’s how you build trust.
Step 5: Design Your Conversion Offer and Sales Page
Your nurture sequence has done its job. Your prospect understands their problem, trusts your expertise, and is ready to learn about working with you. Now you need an offer that makes saying yes feel like the obvious choice.
Create an offer that removes risk from the buying decision. For service businesses, this often means free consultations, money-back guarantees, or “pay only if satisfied” arrangements. For product businesses, it might be free trials, easy returns, or satisfaction guarantees.
The goal isn’t to give away your services for free. It’s to make the first step feel safe. When someone knows they can get their money back if you don’t deliver results, the perceived risk of hiring you drops dramatically.
Structure your sales page to match the prospect’s journey. Start by restating the problem they’re facing. They should immediately think, “Yes, that’s exactly what I’m dealing with.”
Then agitate that problem slightly. What happens if they don’t solve it? What’s the cost of inaction? Don’t fear-monger, but be honest about the consequences of ignoring the issue.
Present your solution as the bridge between their current situation and their desired outcome. Explain what you do, how you do it, and why your approach works better than alternatives. Understanding website conversion rates helps you benchmark whether your sales page is performing at industry standards.
Include specific pricing and clear next steps. Ambiguity kills conversions. “Contact us for pricing” creates friction. “Our standard service package is $X and includes [specific deliverables]” builds trust through transparency.
If you offer multiple service tiers, present them clearly with the differences between each level. Many businesses find success with a three-tier pricing structure: a basic option, a recommended middle tier, and a premium option.
Add urgency elements where they’re genuine. If you truly have limited availability, say so. If you offer seasonal pricing, mention the deadline. If early adopters get a bonus, make that clear. But never create false scarcity—it damages trust.
Include testimonials that address specific objections. If prospects worry about the time commitment, share a testimonial that mentions how easy the process was. If they’re concerned about results, show before-and-after outcomes from similar clients.
End with a strong call-to-action that tells them exactly what to do next. “Schedule Your Free Strategy Call,” “Get Started Today,” or “Claim Your Spot” all work better than vague phrases like “Learn More.”
Step 6: Drive Targeted Traffic to Your Funnel Entry Point
You’ve built the funnel. Now you need people to enter it. This is where many local businesses get overwhelmed by options. Should you focus on SEO? Social media? Paid ads? Networking?
Start with one traffic source based on where your ideal customers already spend time. If they’re searching Google when they need your service urgently, Google Ads makes sense. If they’re scrolling Facebook in the evenings, that’s where you should be.
For most local service businesses, paid advertising provides the fastest path to results. You can launch a campaign today and start getting data within hours. Organic strategies like SEO and content marketing work, but they take months to build momentum. Learning how to increase traffic to your website gives you multiple options for filling your funnel.
Google Ads works exceptionally well for high-intent searches. When someone types “emergency plumber near me” or “divorce attorney in [city],” they’re actively looking for help right now. These are valuable clicks worth paying for.
Facebook and Instagram ads excel at building awareness and capturing people before they’re in crisis mode. You can target by location, interests, behaviors, and demographics to reach your ideal customer profile even when they’re not actively searching. Mastering how to create ads that resonate with your audience is essential for driving qualified traffic.
Set up proper tracking before you spend a dollar. Install conversion pixels on your landing page and sales page. Use UTM parameters in your ad URLs so you can track which campaigns, ad sets, and individual ads are driving results.
Without tracking, you’re flying blind. You might know you got 50 leads this month, but you won’t know which $500 of your $2,000 ad spend actually generated those leads. Implementing a system to track marketing ROI ensures every dollar is accountable.
Budget for testing. Plan to spend money learning what works before you optimize for profitability. A realistic testing budget for a local business might be $1,000-$2,000 per month for the first 60-90 days.
Test different ad creatives, headlines, and targeting options. The first version you launch is rarely the winner. Expect to refine your approach based on what the data tells you.
Once you find a winning combination, scale gradually. Double your budget over a few weeks rather than overnight. This helps maintain performance as you reach more people.
Step 7: Track, Test, and Optimize Each Funnel Stage
Your funnel is live and traffic is flowing. Now comes the ongoing work that separates businesses with mediocre funnels from those with high-converting machines: consistent optimization.
Identify your key metrics at each funnel stage. How many people are clicking your ads? What percentage of landing page visitors are opting in? How many email subscribers are opening your messages? What’s your conversion rate from lead to customer?
These numbers tell you where your funnel is working and where it’s broken. If 1,000 people visit your landing page but only 50 opt in, your landing page needs work. If 500 people download your lead magnet but only 10 become customers, your offer or nurture sequence needs attention. Focusing on conversion funnel optimization helps you systematically improve each stage.
Set up a simple dashboard to monitor funnel performance weekly. You don’t need expensive software—a Google Sheet with your key metrics works fine. Track traffic, opt-in rate, email open rates, click-through rates, and conversion rate.
Benchmark your performance against industry standards. Landing page conversion rates for lead magnets typically range from 20-30%. Email open rates should be above 20%. Click-through rates on your calls-to-action should exceed 2-3%.
If you’re significantly below these benchmarks, you know where to focus your optimization efforts.
Test one element at a time. Change your landing page headline and measure the impact before testing a new form layout. Try a different email subject line before rewriting the entire email. This way, you’ll know what actually moved the needle.
Common elements worth testing include: landing page headlines, call-to-action button copy and color, email subject lines, the number of form fields, the order of information on your sales page, and your pricing presentation. Understanding how to improve website conversion rate gives you a framework for prioritizing these tests.
Small improvements compound over time. Increasing your landing page conversion rate from 20% to 25% means 25% more leads from the same traffic. Improving your sales conversion rate from 10% to 12% means 20% more customers from the same leads.
Review your funnel performance weekly, but make changes monthly. You need enough data to know whether a change actually improved results or if you just got lucky with timing.
Pay attention to where people drop off. If most people read your first three emails but stop opening after that, emails four through seven need work. If people schedule consultations but don’t show up, your reminder process needs improvement.
Putting It All Together
Building a sales funnel isn’t a one-time project. It’s an ongoing system that compounds over time. The businesses that win aren’t necessarily the ones with the biggest budgets—they’re the ones with the most efficient systems for turning strangers into customers.
Start with the basics: know your customer, offer them something valuable, and guide them step-by-step toward becoming a paying client. Each piece of the funnel works together to build trust and reduce friction in the buying process.
Your quick-start checklist looks like this:
Customer avatar completed: You know exactly who you’re targeting and what journey they’re on.
Lead magnet created and ready to deliver: You have something valuable to offer in exchange for contact information.
Landing page live and tested: Your entry point is optimized to convert visitors into leads.
Email sequence written and scheduled: You have a systematic way to nurture leads toward a purchase decision.
Sales page published: Your offer is clearly presented with specific pricing and next steps.
Traffic source selected and tracking installed: You’re driving targeted visitors to your funnel and measuring results.
Weekly review process scheduled: You’re monitoring performance and making data-driven improvements.
The difference between a business that grows predictably and one that struggles often comes down to systems. When you have a funnel that consistently turns traffic into leads and leads into customers, you’ve built a growth engine you can scale.
Ready to stop guessing and start growing? At Clicks Geek, we build high-converting funnels for local businesses every day. We know what works in your market because we’ve tested it hundreds of times across different industries.
Tired of spending money on marketing that doesn’t produce real revenue? We build lead systems that turn traffic into qualified leads and measurable sales growth. If you want to see what this would look like for your business, we’ll walk you through how it works and break down what’s realistic in your market.
Your funnel is the foundation of predictable growth. Build it right, and everything else gets easier.
Want More Leads for Your Business?
Most agencies chase clicks, impressions, and “traffic.” Clicks Geek builds lead systems. We uncover where prospects are dropping off, where your budget is being wasted, and which channels will actually produce ROI for your business, then we build and manage the strategy for you.